
How to Send SMS Messages From Zendesk

How to set up inbound SMS Support
Do you want to use SMS messages as a part of your support?
We have previously covered the benefits of doing this. Now here’s a step-by-step on how to implement it in your system. The guide is divided into three sections:
- In the first section we will focus on how to configure GatewayAPI and Zendesk.
- In the second section, we will focus on enabling our customers to send SMS messages back to us in order to create and update tickets.
- Lastly, we will will focus on how to set up Zendesk to send replies to tickets as SMS messages.
1. Configure GatewayAPI and Zendesk
To enable the system to receive SMS messages, it is necessary to do a bit of configuration in Zendesk and in the GatewayAPI account.
Zendesk
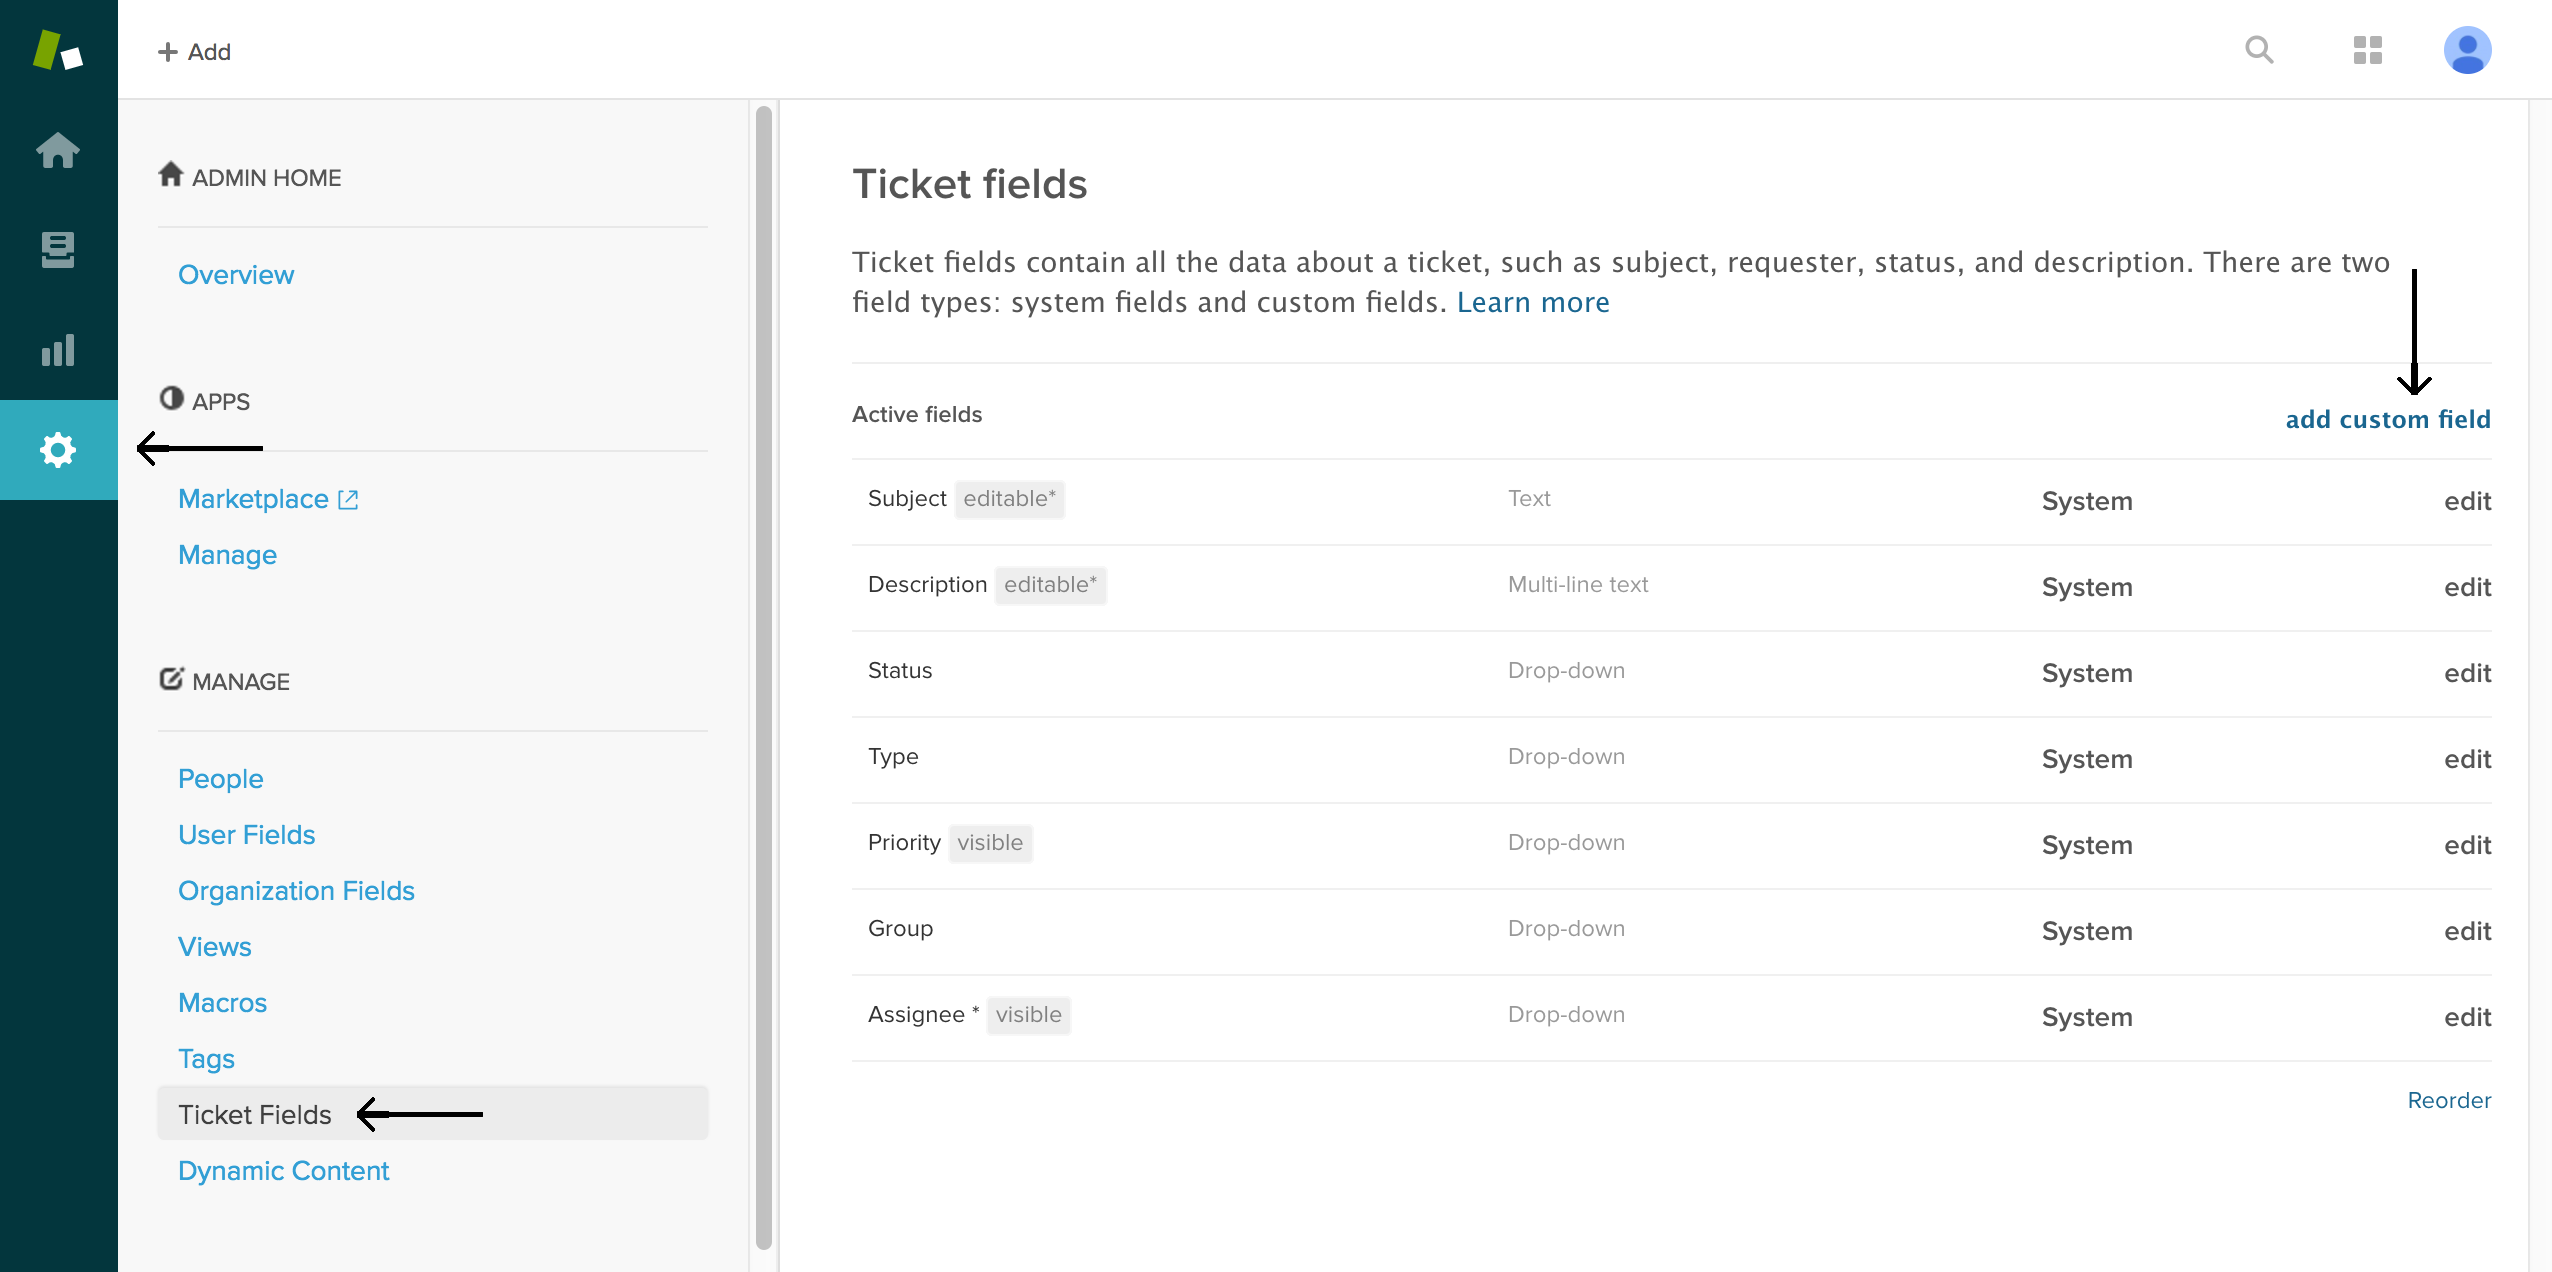
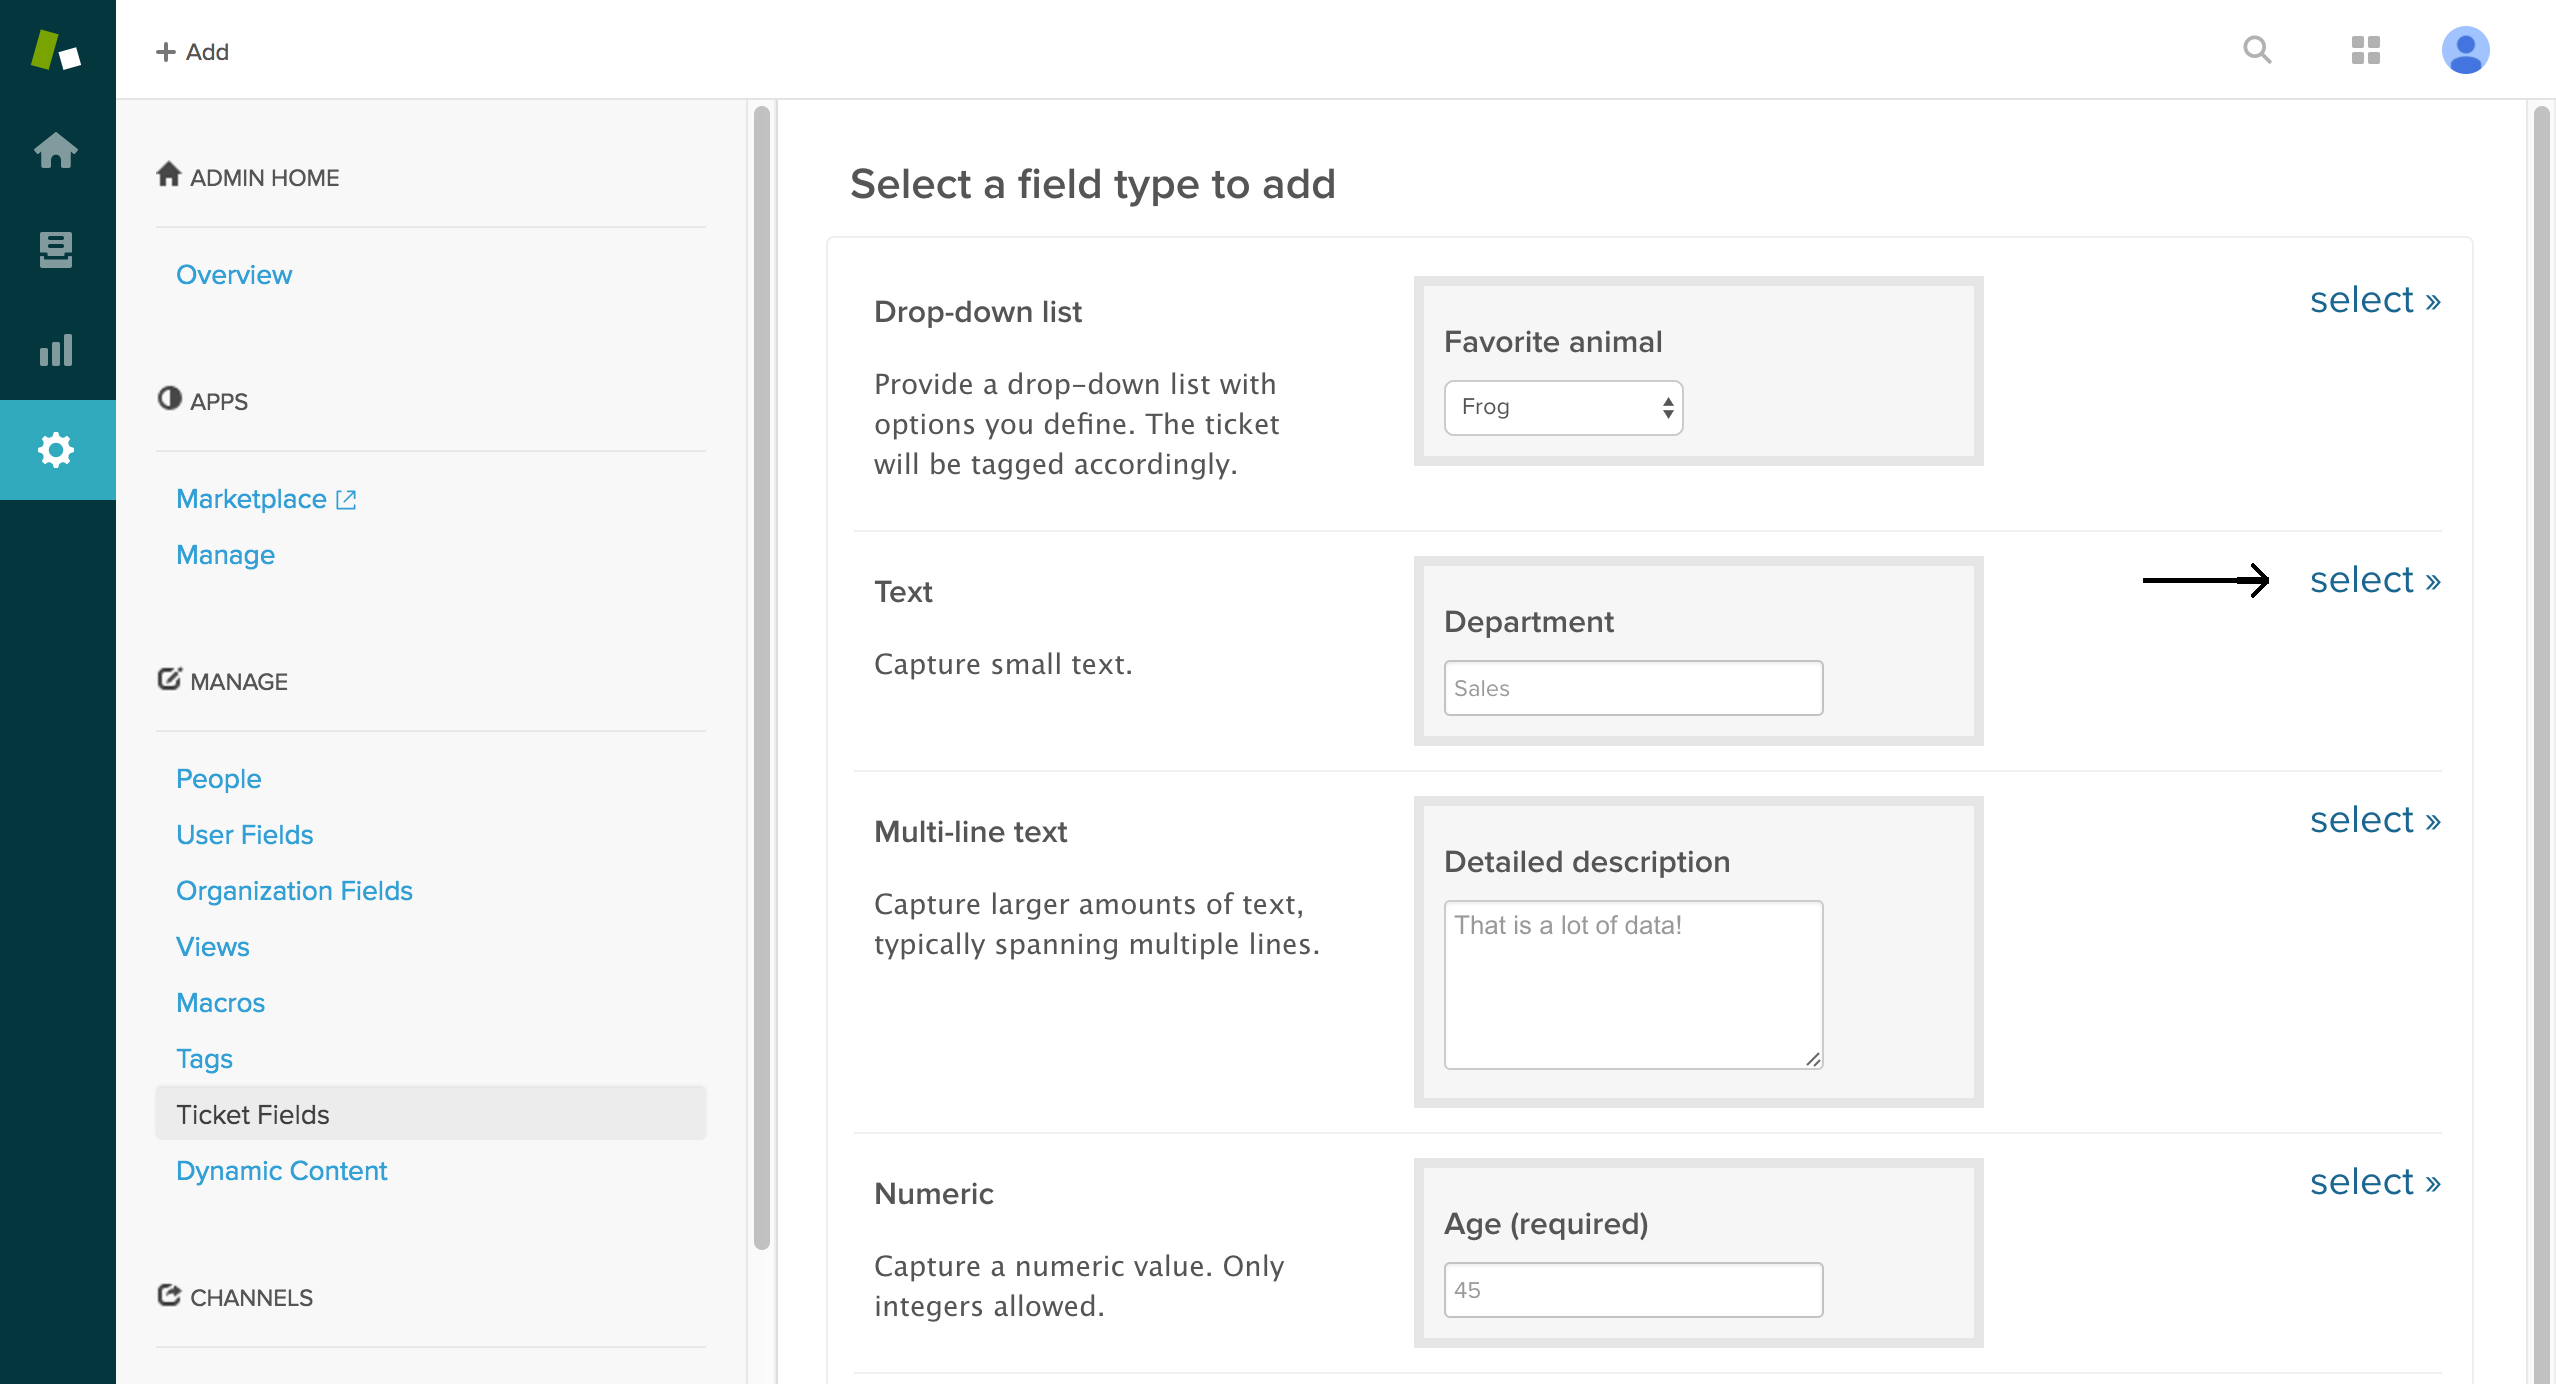
Start by clicking on ‘Settings’ on the left hand menu and under ‘Manage’ go to ‘Ticket Fields’. Click on ‘add custom field’ and select the ‘text-field’ option.
GatewayAPI
To enable GatewayAPI to receive messages, you first need a phone number that can receive the messages. This can be done in a number of ways. Here we will be using a virtual phone, which can be leased through us, if you want to hear the other options, please contact us on our livechat.
When you have a number ready, you need to set up a URL that can be used to receive HTTP POST requests for the messages you receive. The request will contain a bunch of data: Among other the phone number and the text body of the message.
In this example we will be using the localhost tunnel tool ‘ngrok’, Python and the Flask library to run the code, and give us a public URL that we can use for the web hook.
For a production environment, you will of course need to have it running on an actual server. Zendesk supports a wide range of different programming languages including PHP. You can get a full overview of the languages they have libraries for here.
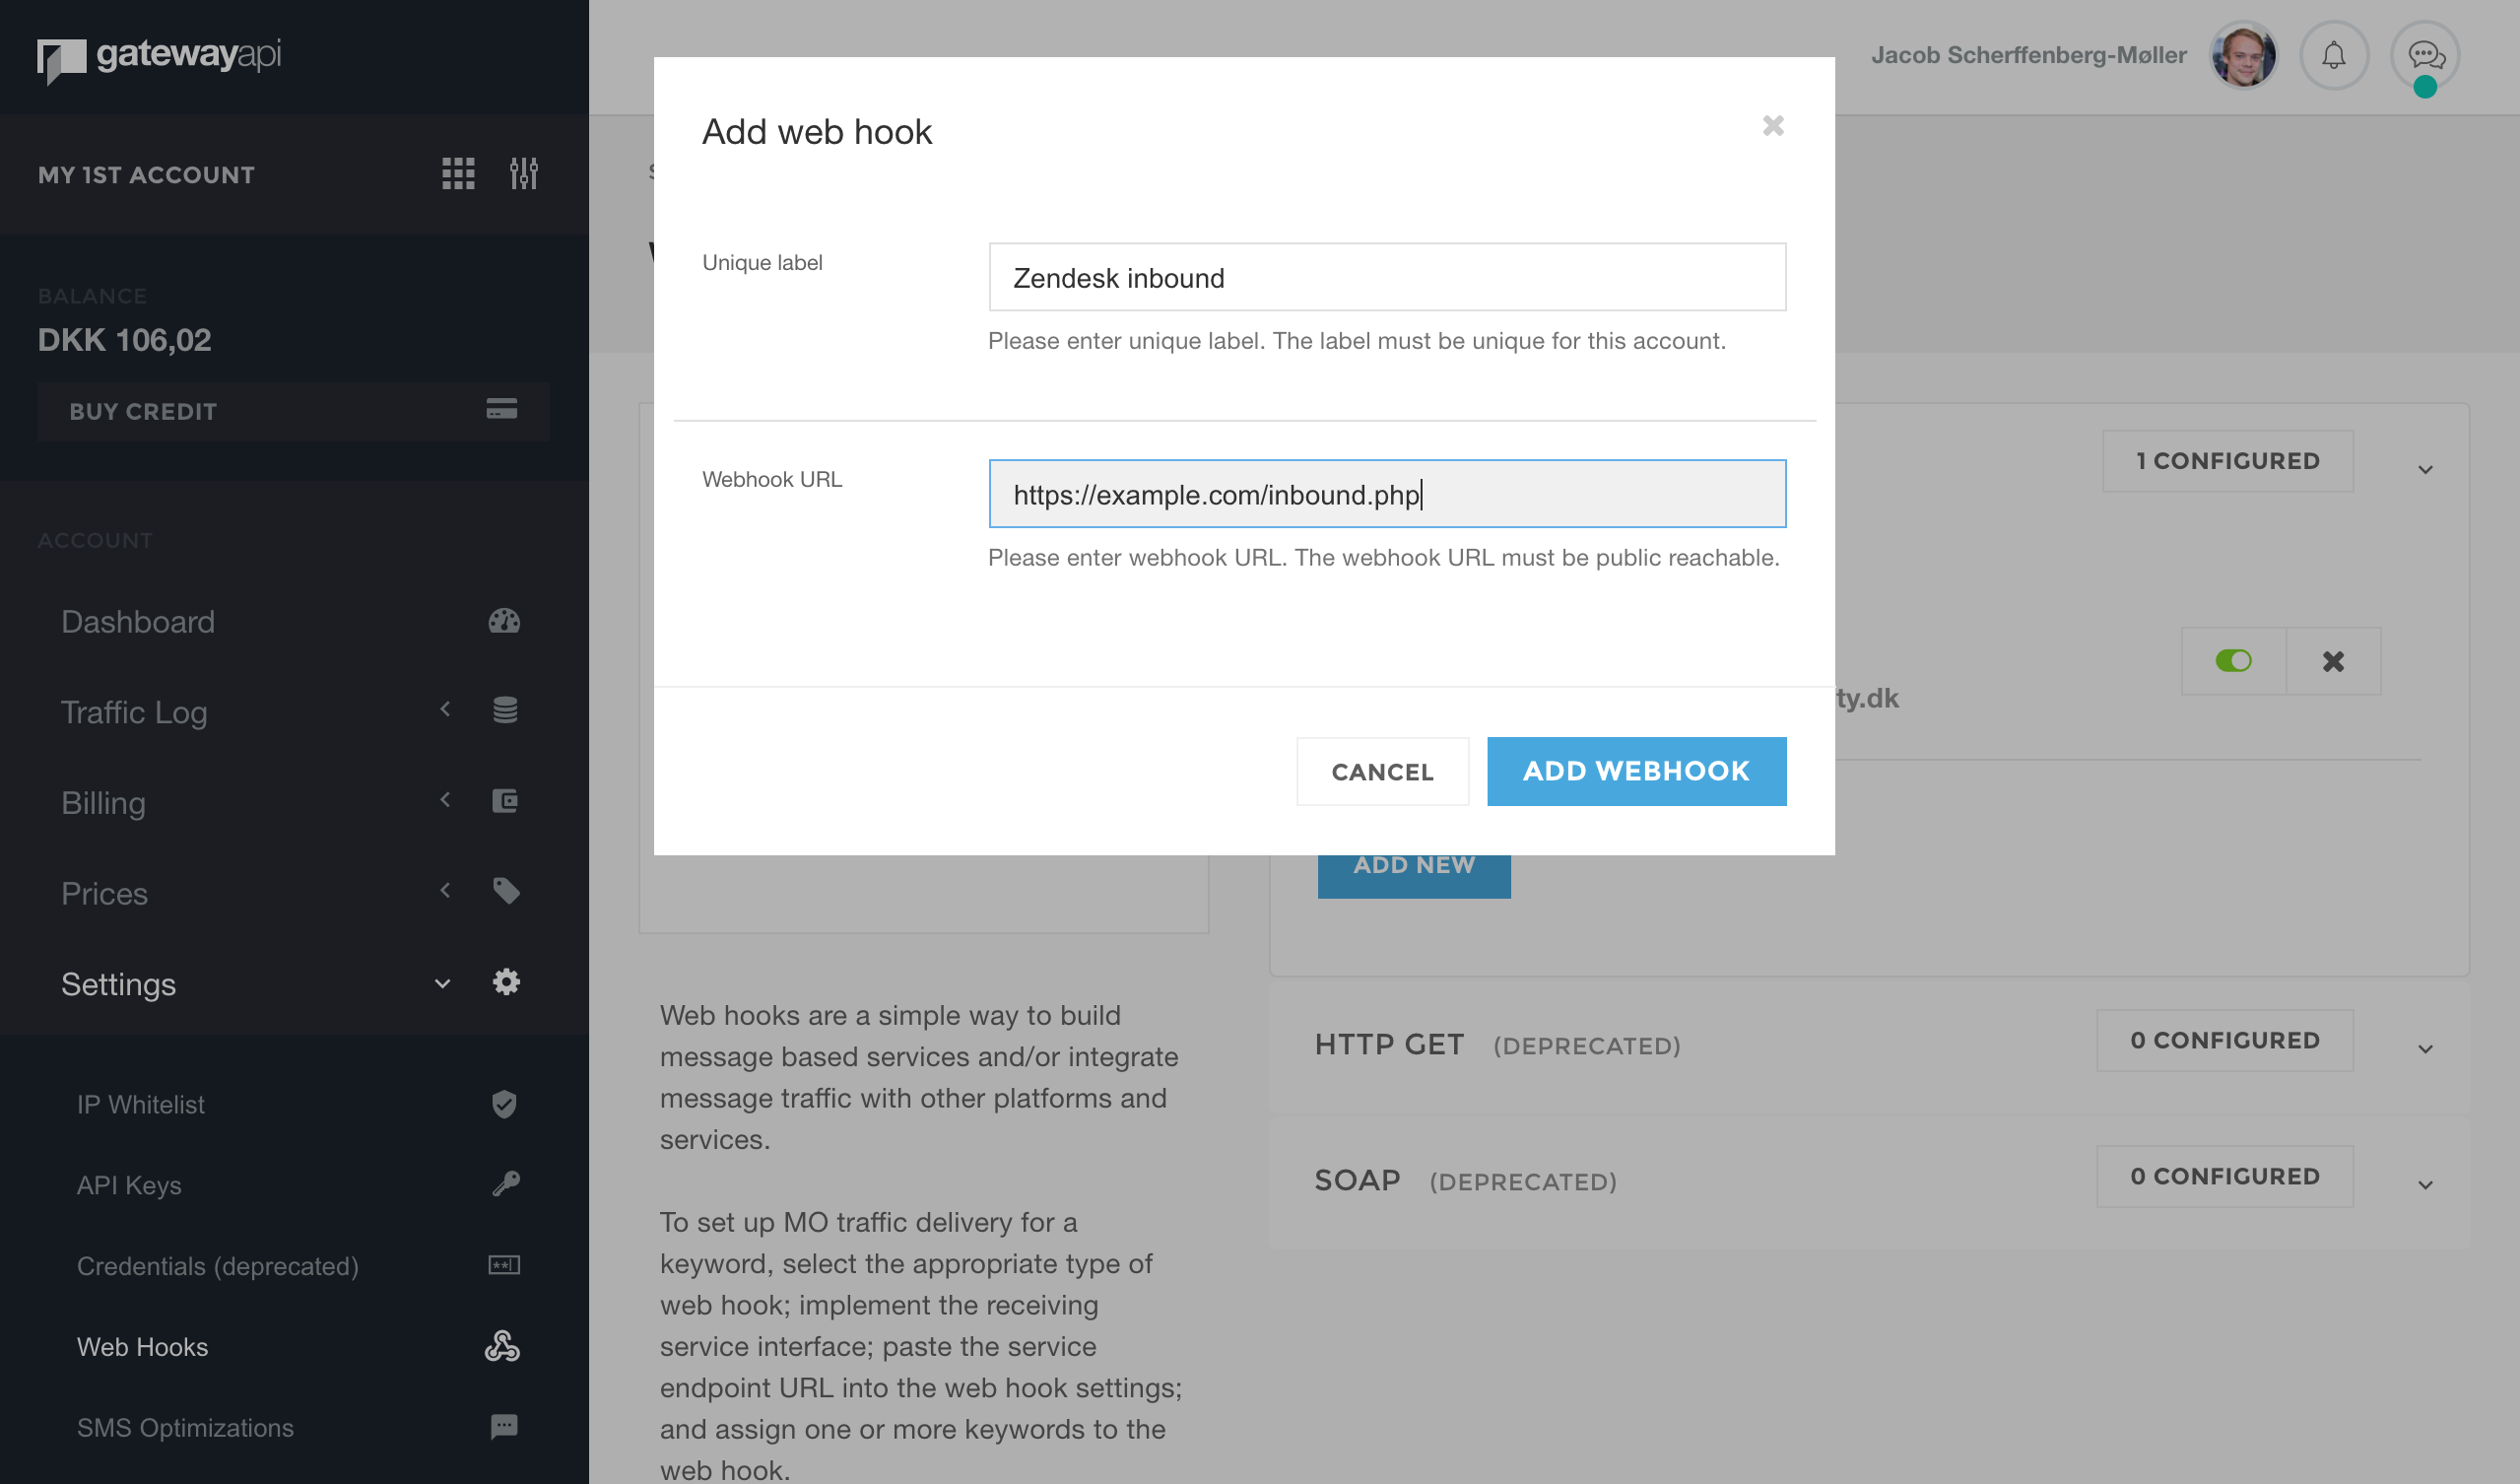
To complete the setup, go to ‘Settings’ in the GatewayAPI backend -> then ‘web hooks’ -> and lastly click on ‘add a new REST web hook’. Give your webhook a name and insert your url.
Now GatewayAPI and Zendesk are ready for the next step, in which will focus on how to enable customers to send SMS messages to you.
2. Enable customers to send SMS messages back
With Zendesk and GatewayAPI configured, It’s now time to start putting some actual functionality on the webhook. As mentioned, we will be using Python but you are free to use whatever programming language you prefer. You can also just communicate directly with Zendesks API which is very well documented
We will use the following libraries to perform the various tasks:

To begin with, define a function that will send an SMS back to the customer to confirm what actions have been taken based on their input. It can also be a report indicating that their input was not understood or not allowed.
You now need to make a set of commands for the users to get support via SMS. The code will casefold the command, so it can handle mix cased input correctly. All commands, except ‘Help’ will search for the command keyword first, followed by the message that the ticket will be created or updated with. A list of commands could be:
- Help
- New
- [ID] – the integer id of the ticket to update.
This list can be extended with anything you might find useful by utilizing the Zendesk API.
Now we are at the exciting part, where we are going to add some actual Zendesk functionality to our solution. First you need to decide on your method of authentication. We will use token based authentication in this example. For this you need to create an API token in Zendesk by clicking ‘Settings’ in the menu, and under ‘Channels’ click ‘API’. Now you can use the token to set up a Zenpy client in Python.
If you are not familiar with Python, the ‘**credentials’ pass the content of the dictionary to Zenpy as keyword arguments. Define a route in Flask afterwards which should be the URL you have chosen for the webhook in GatewayAPI. It should be configured to only accept POST requests since that is how inbound messages are sent.
First get the JSON body of the incoming request and retrieve the message, then split the string at spaces, and check if the first word matches the keyword ‘new’. If that is case, you can discard the keyword since you don’t need it any longer.
Afterwards check that there is other words after ‘new’. If not, then write back to the customer and request that they send an actual message along with the keyword. If there are more words, join them back to a string and create a ticket using the first 40 characters as the subject and the full message as the body of the ticket.
Afterwards you need to set the requester of the ticket to an anonymous user. To do this, create a user with name, and external_id, both set to, the phone number that sent the SMS. If this is not configured, it will use the credentials from the API call which would make all SMS tickets look like they are from your developer.
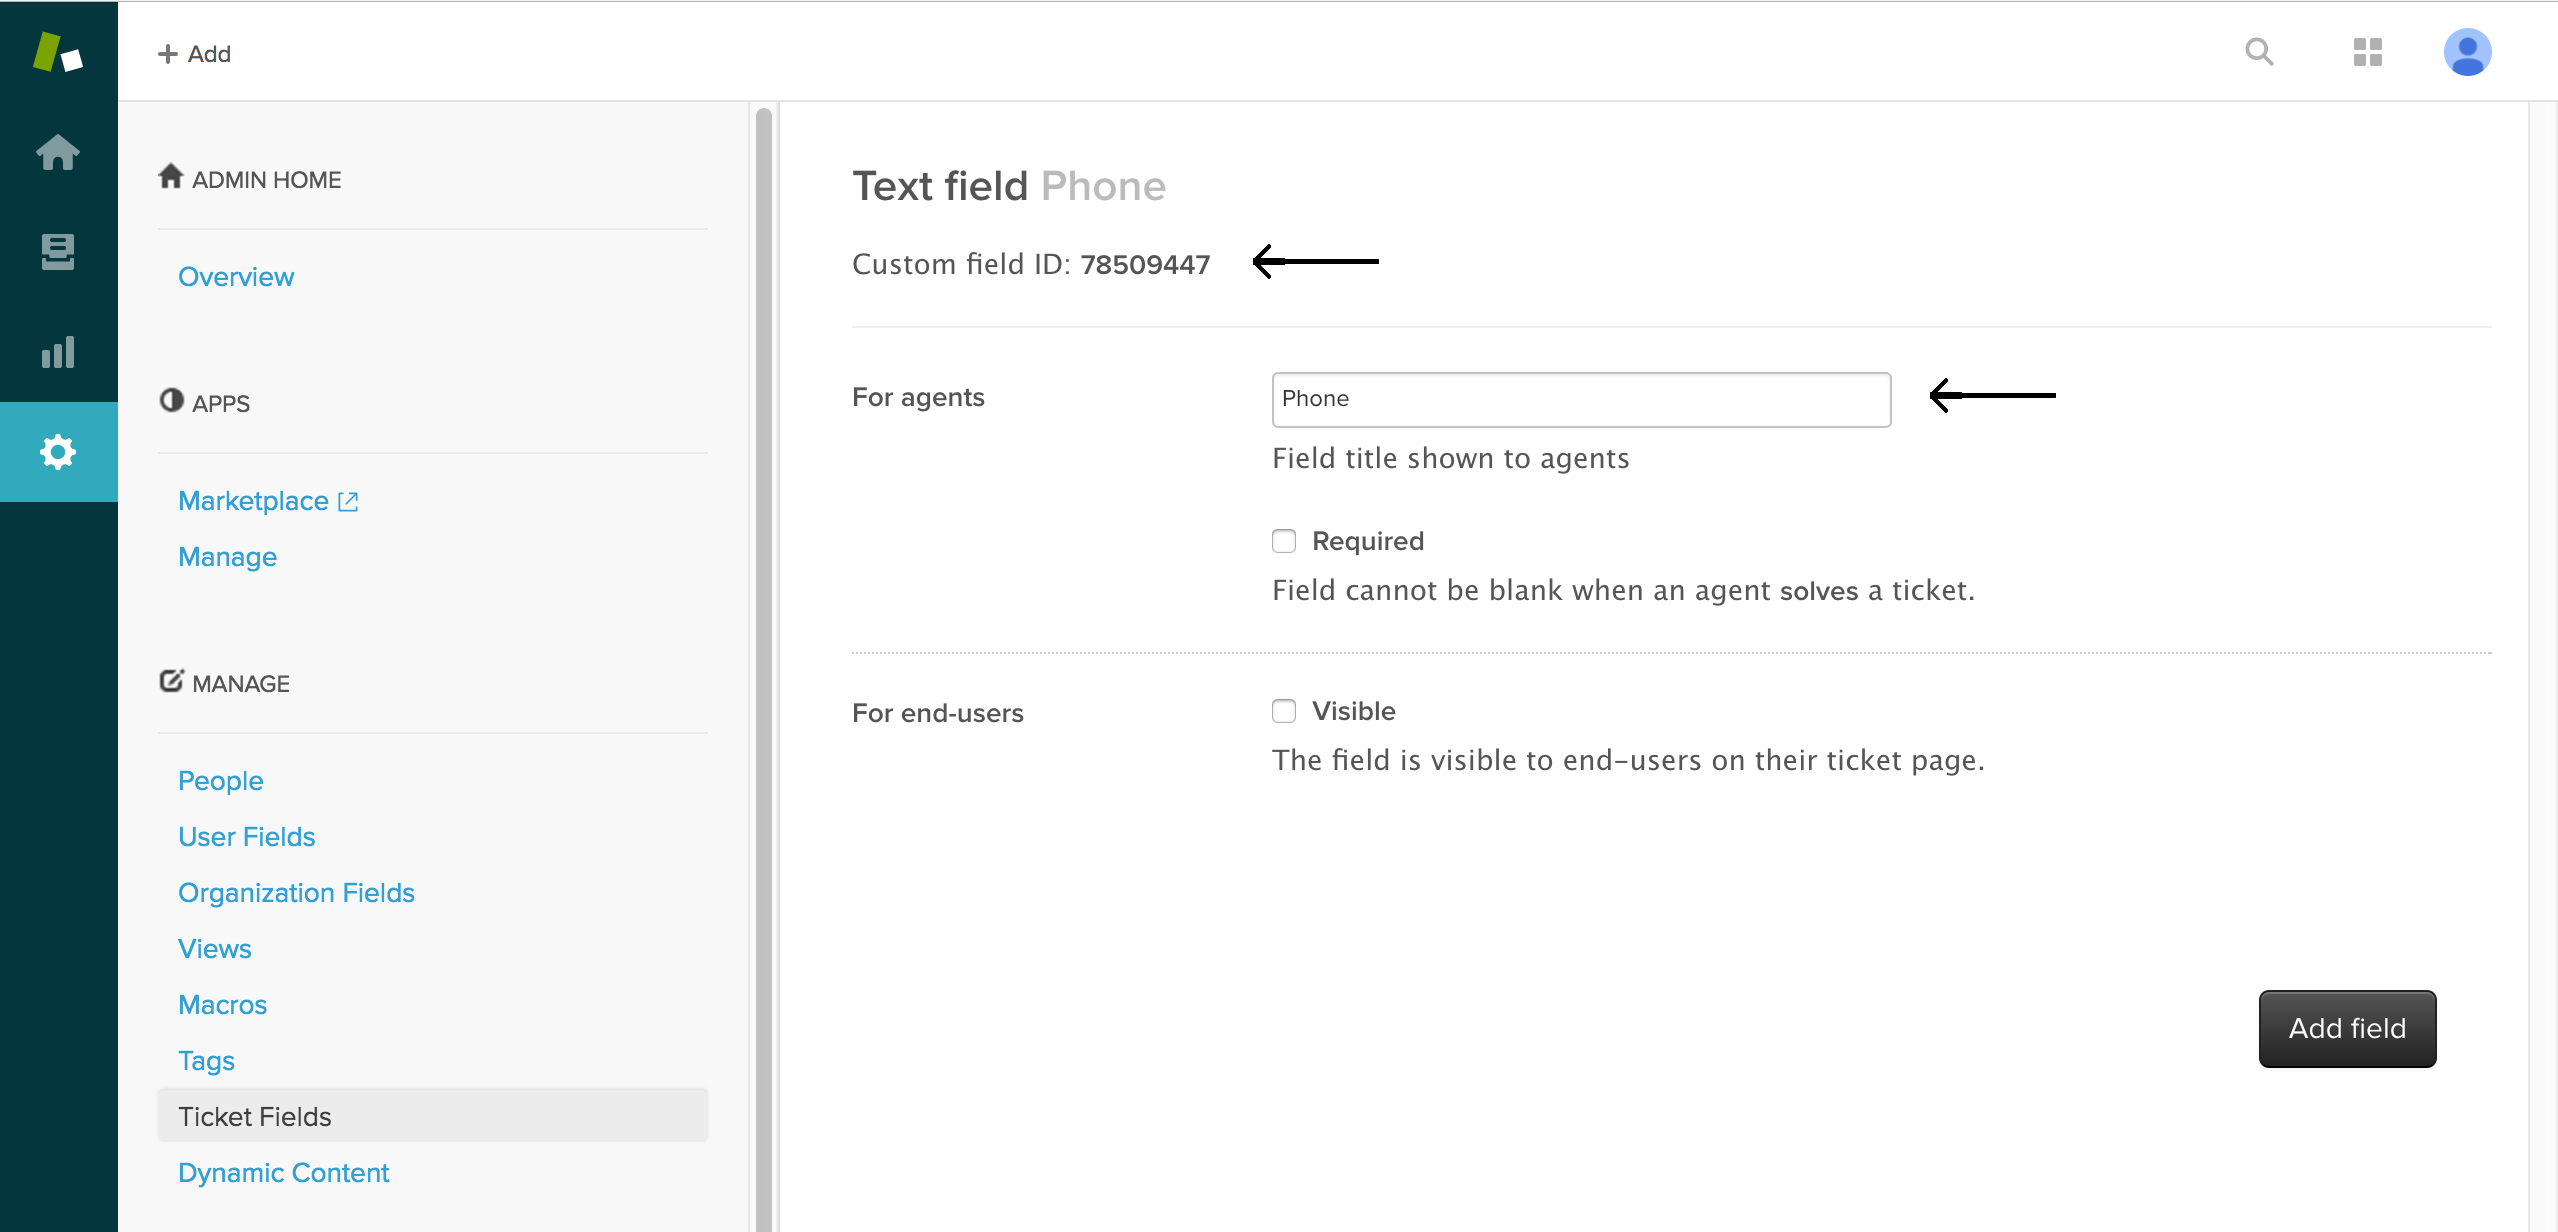
Then set the custom field ‘phone to the phone number’. Remember we saved the custom field ID way back when we started, we finally need it, good luck finding your post-it note ;). The custom field is also needed so we can use the Zendesk placeholder later on.
Now to checking if the customer wishes to update an existing ticket.
First, get the existing ticket. Then check that the ticket is being updated from the same phone number that created it. If not, we do not allow update to the ticket. This will avoid that tickets are updated randomly. Then discard the keyword part of the message and check that there is a comment to update the ticket with, set the status of the ticket to ‘open’ and update it with the comment message.
Now you need a command to show your customers what they can write to you. Enter the ‘help’ command.
This will simply send back a reply showing what they can do. Lastly, you can set up a safety net that catches all other input and send back a reply indicating that the request was not understood.
3. Replying to tickets with SMS.
To achieve this we are going to need to uses Zendesk’s ‘Target and Trigger’ systems.
Setting up a target
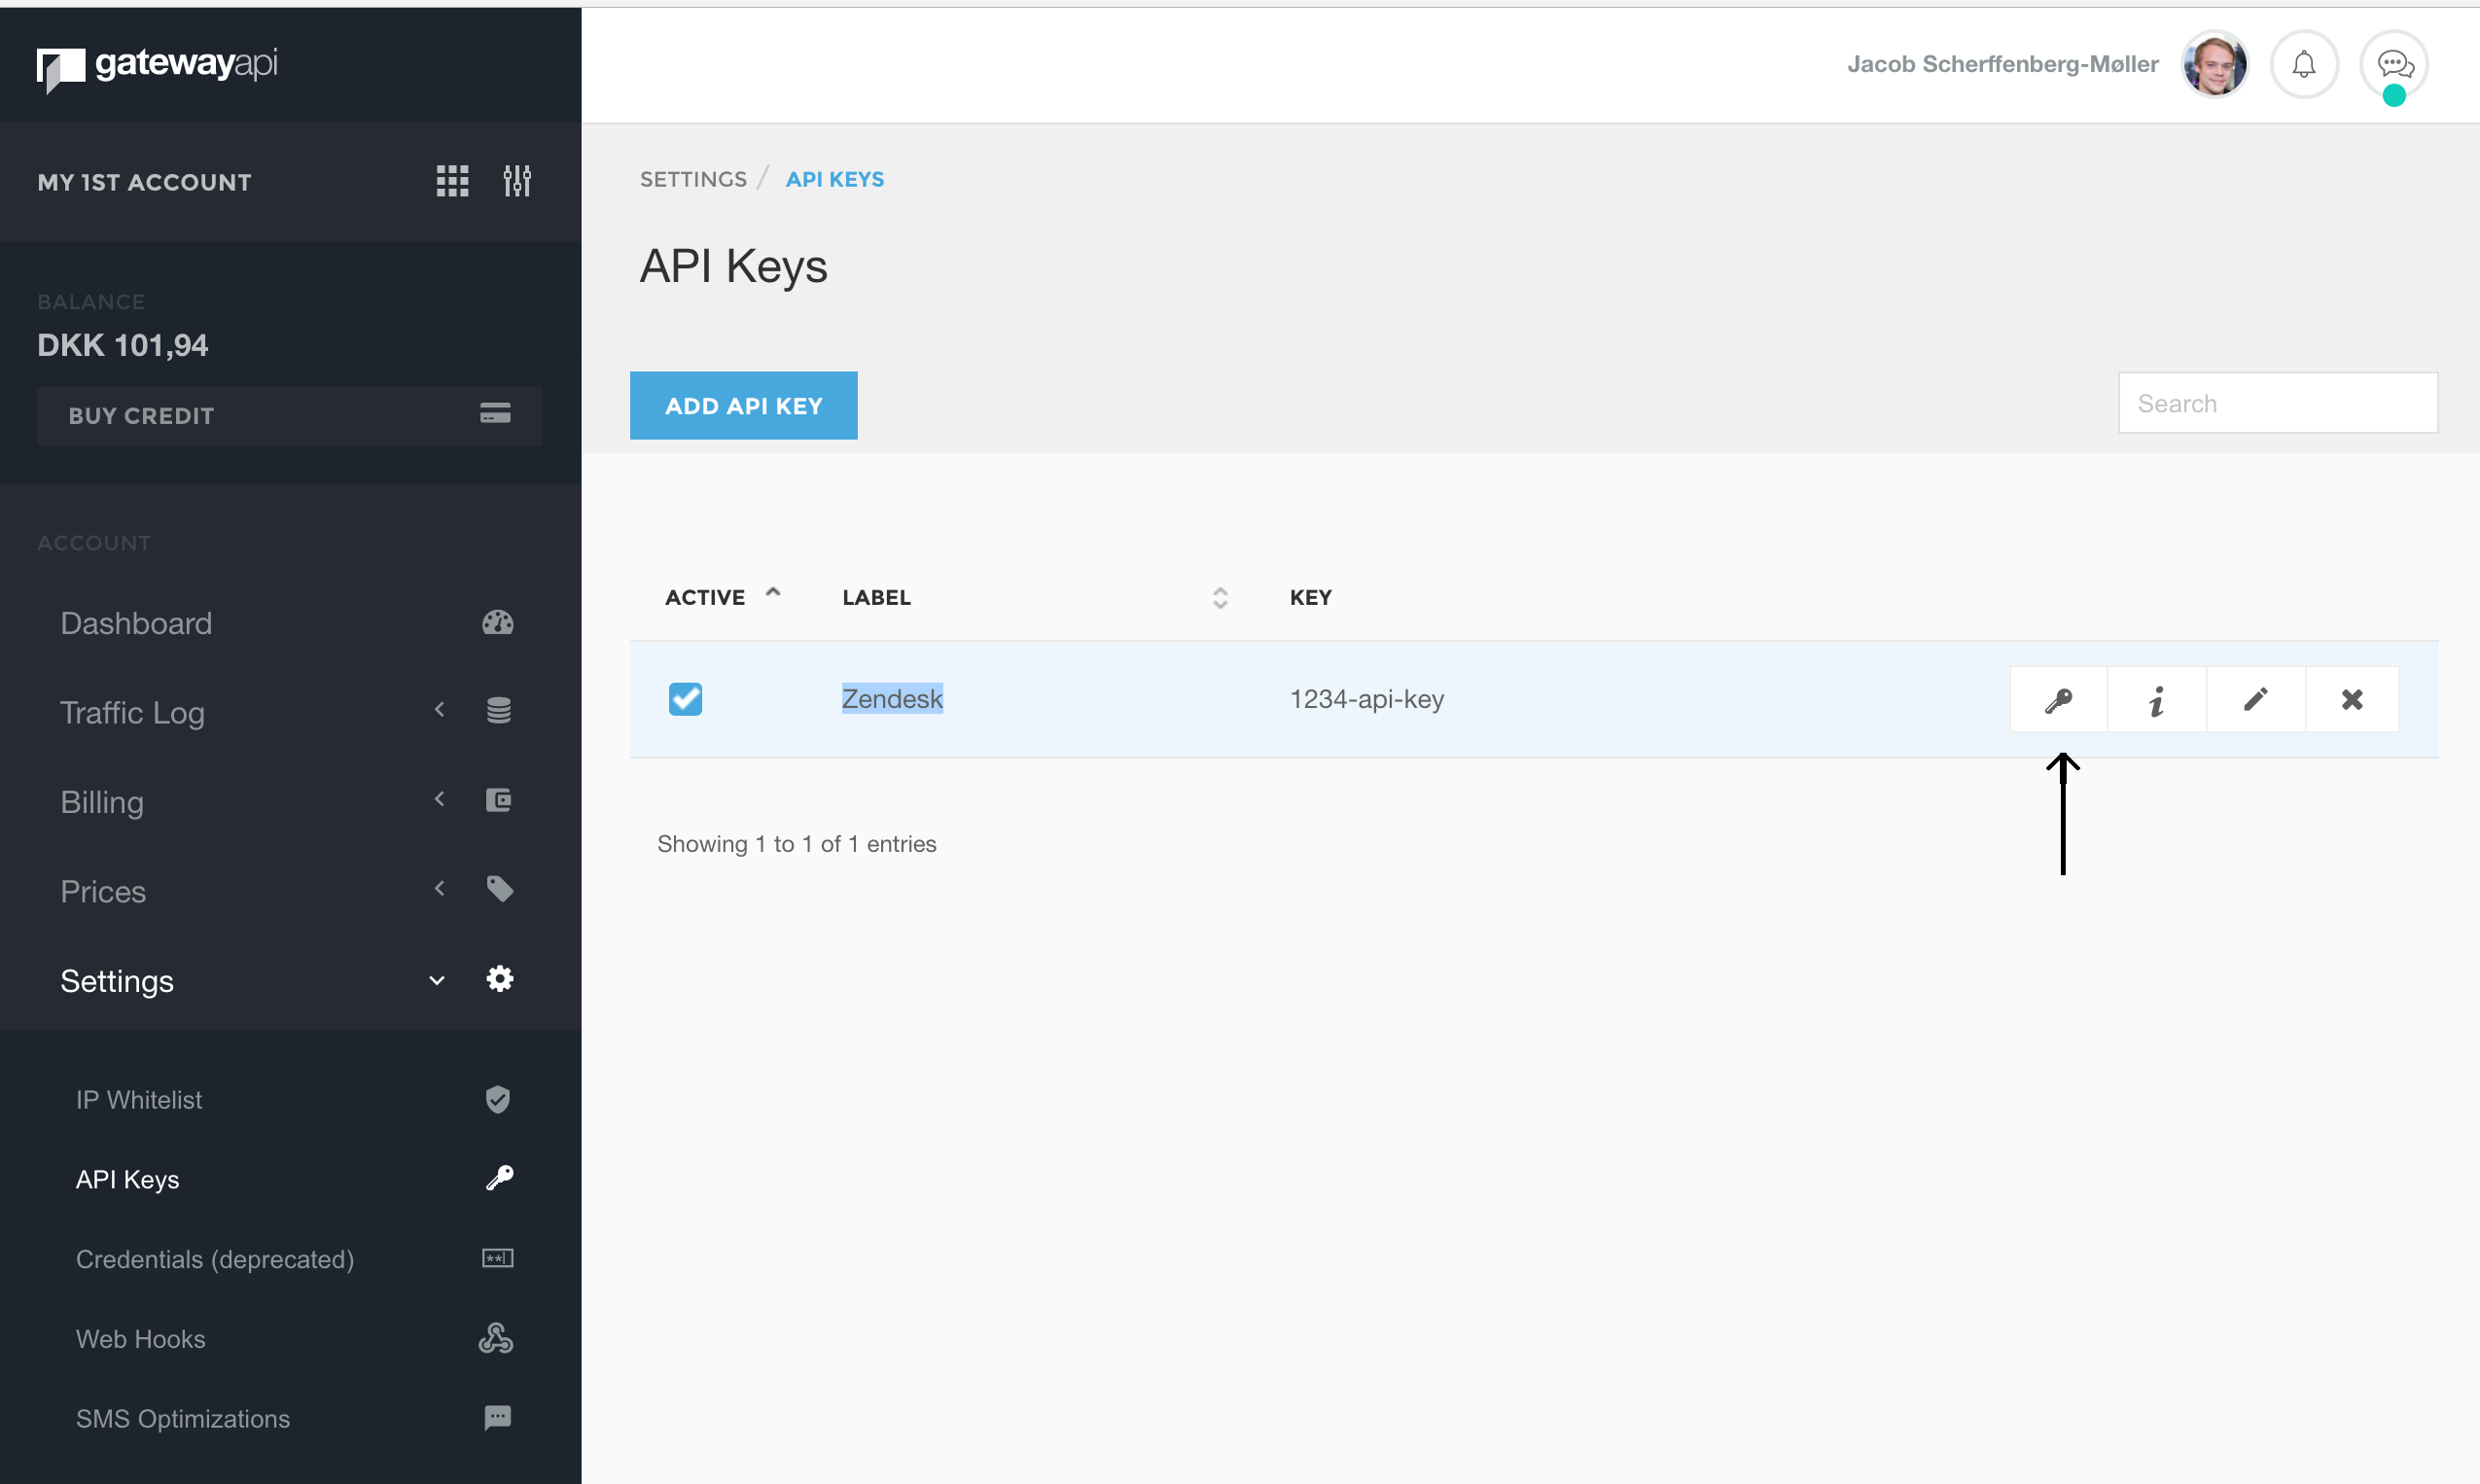
First you need an API token from GatewayAPI. You can get it from settings -> API Keys -> then click the button with the key symbol.
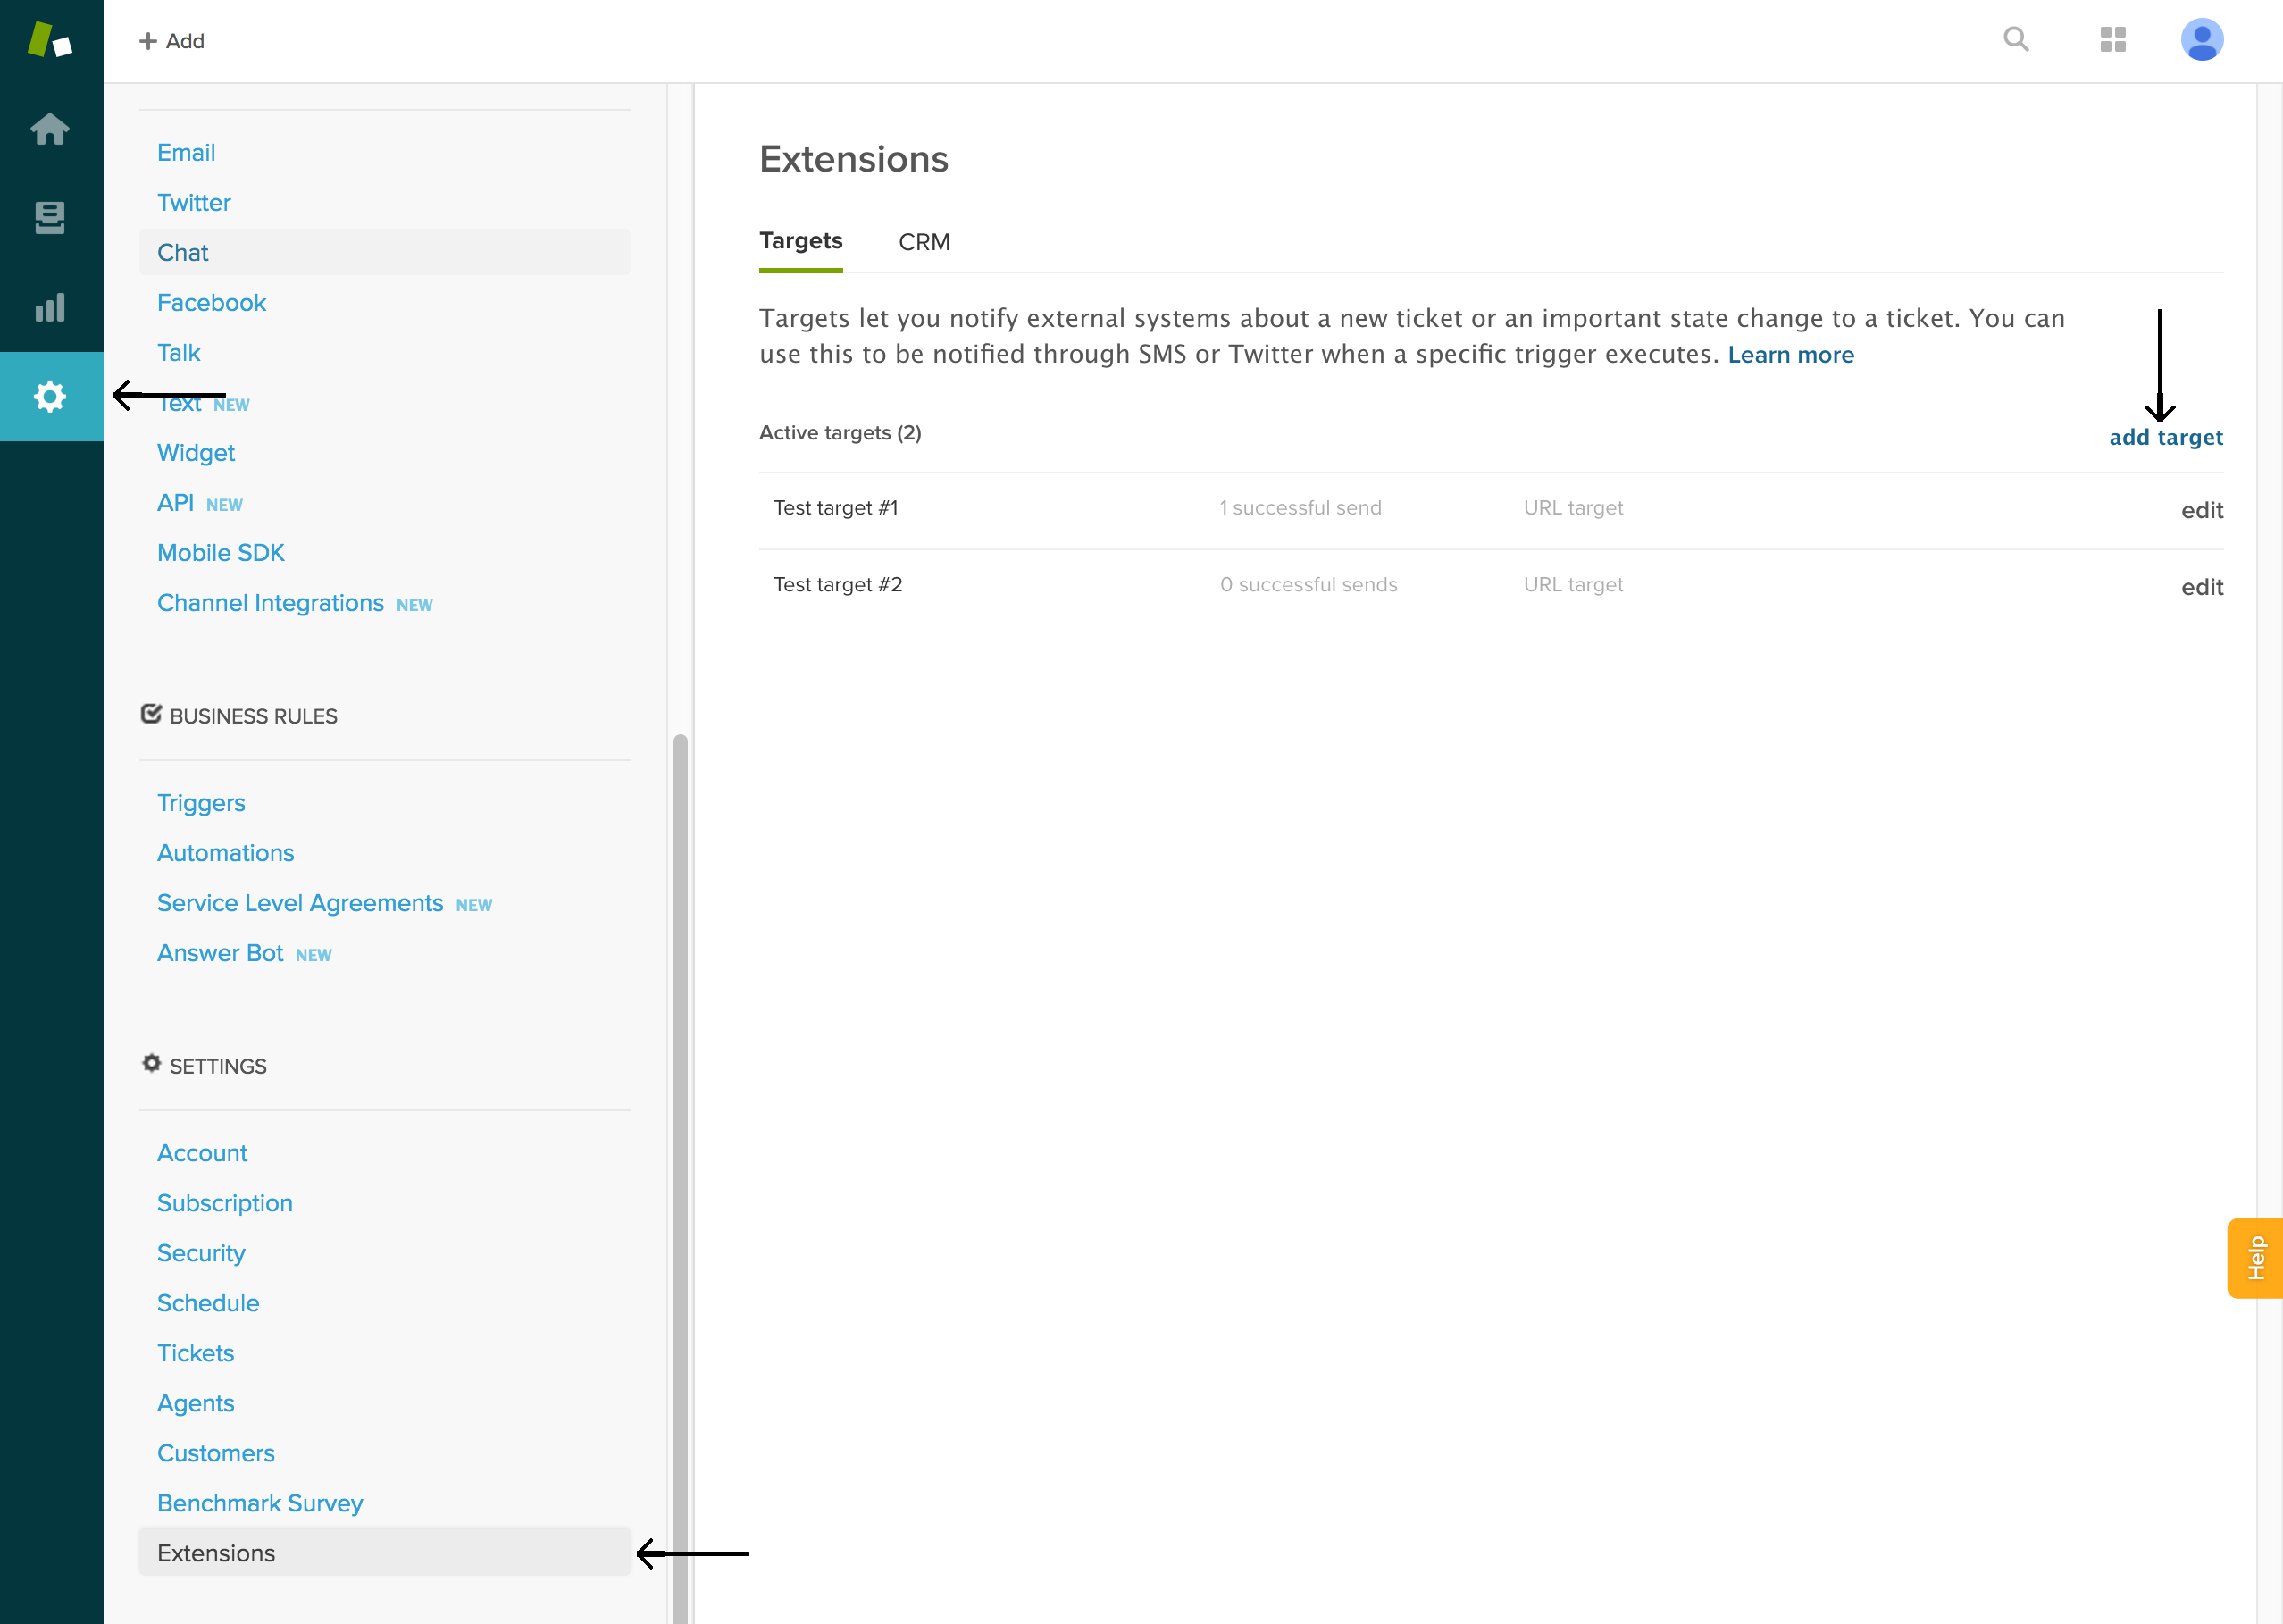
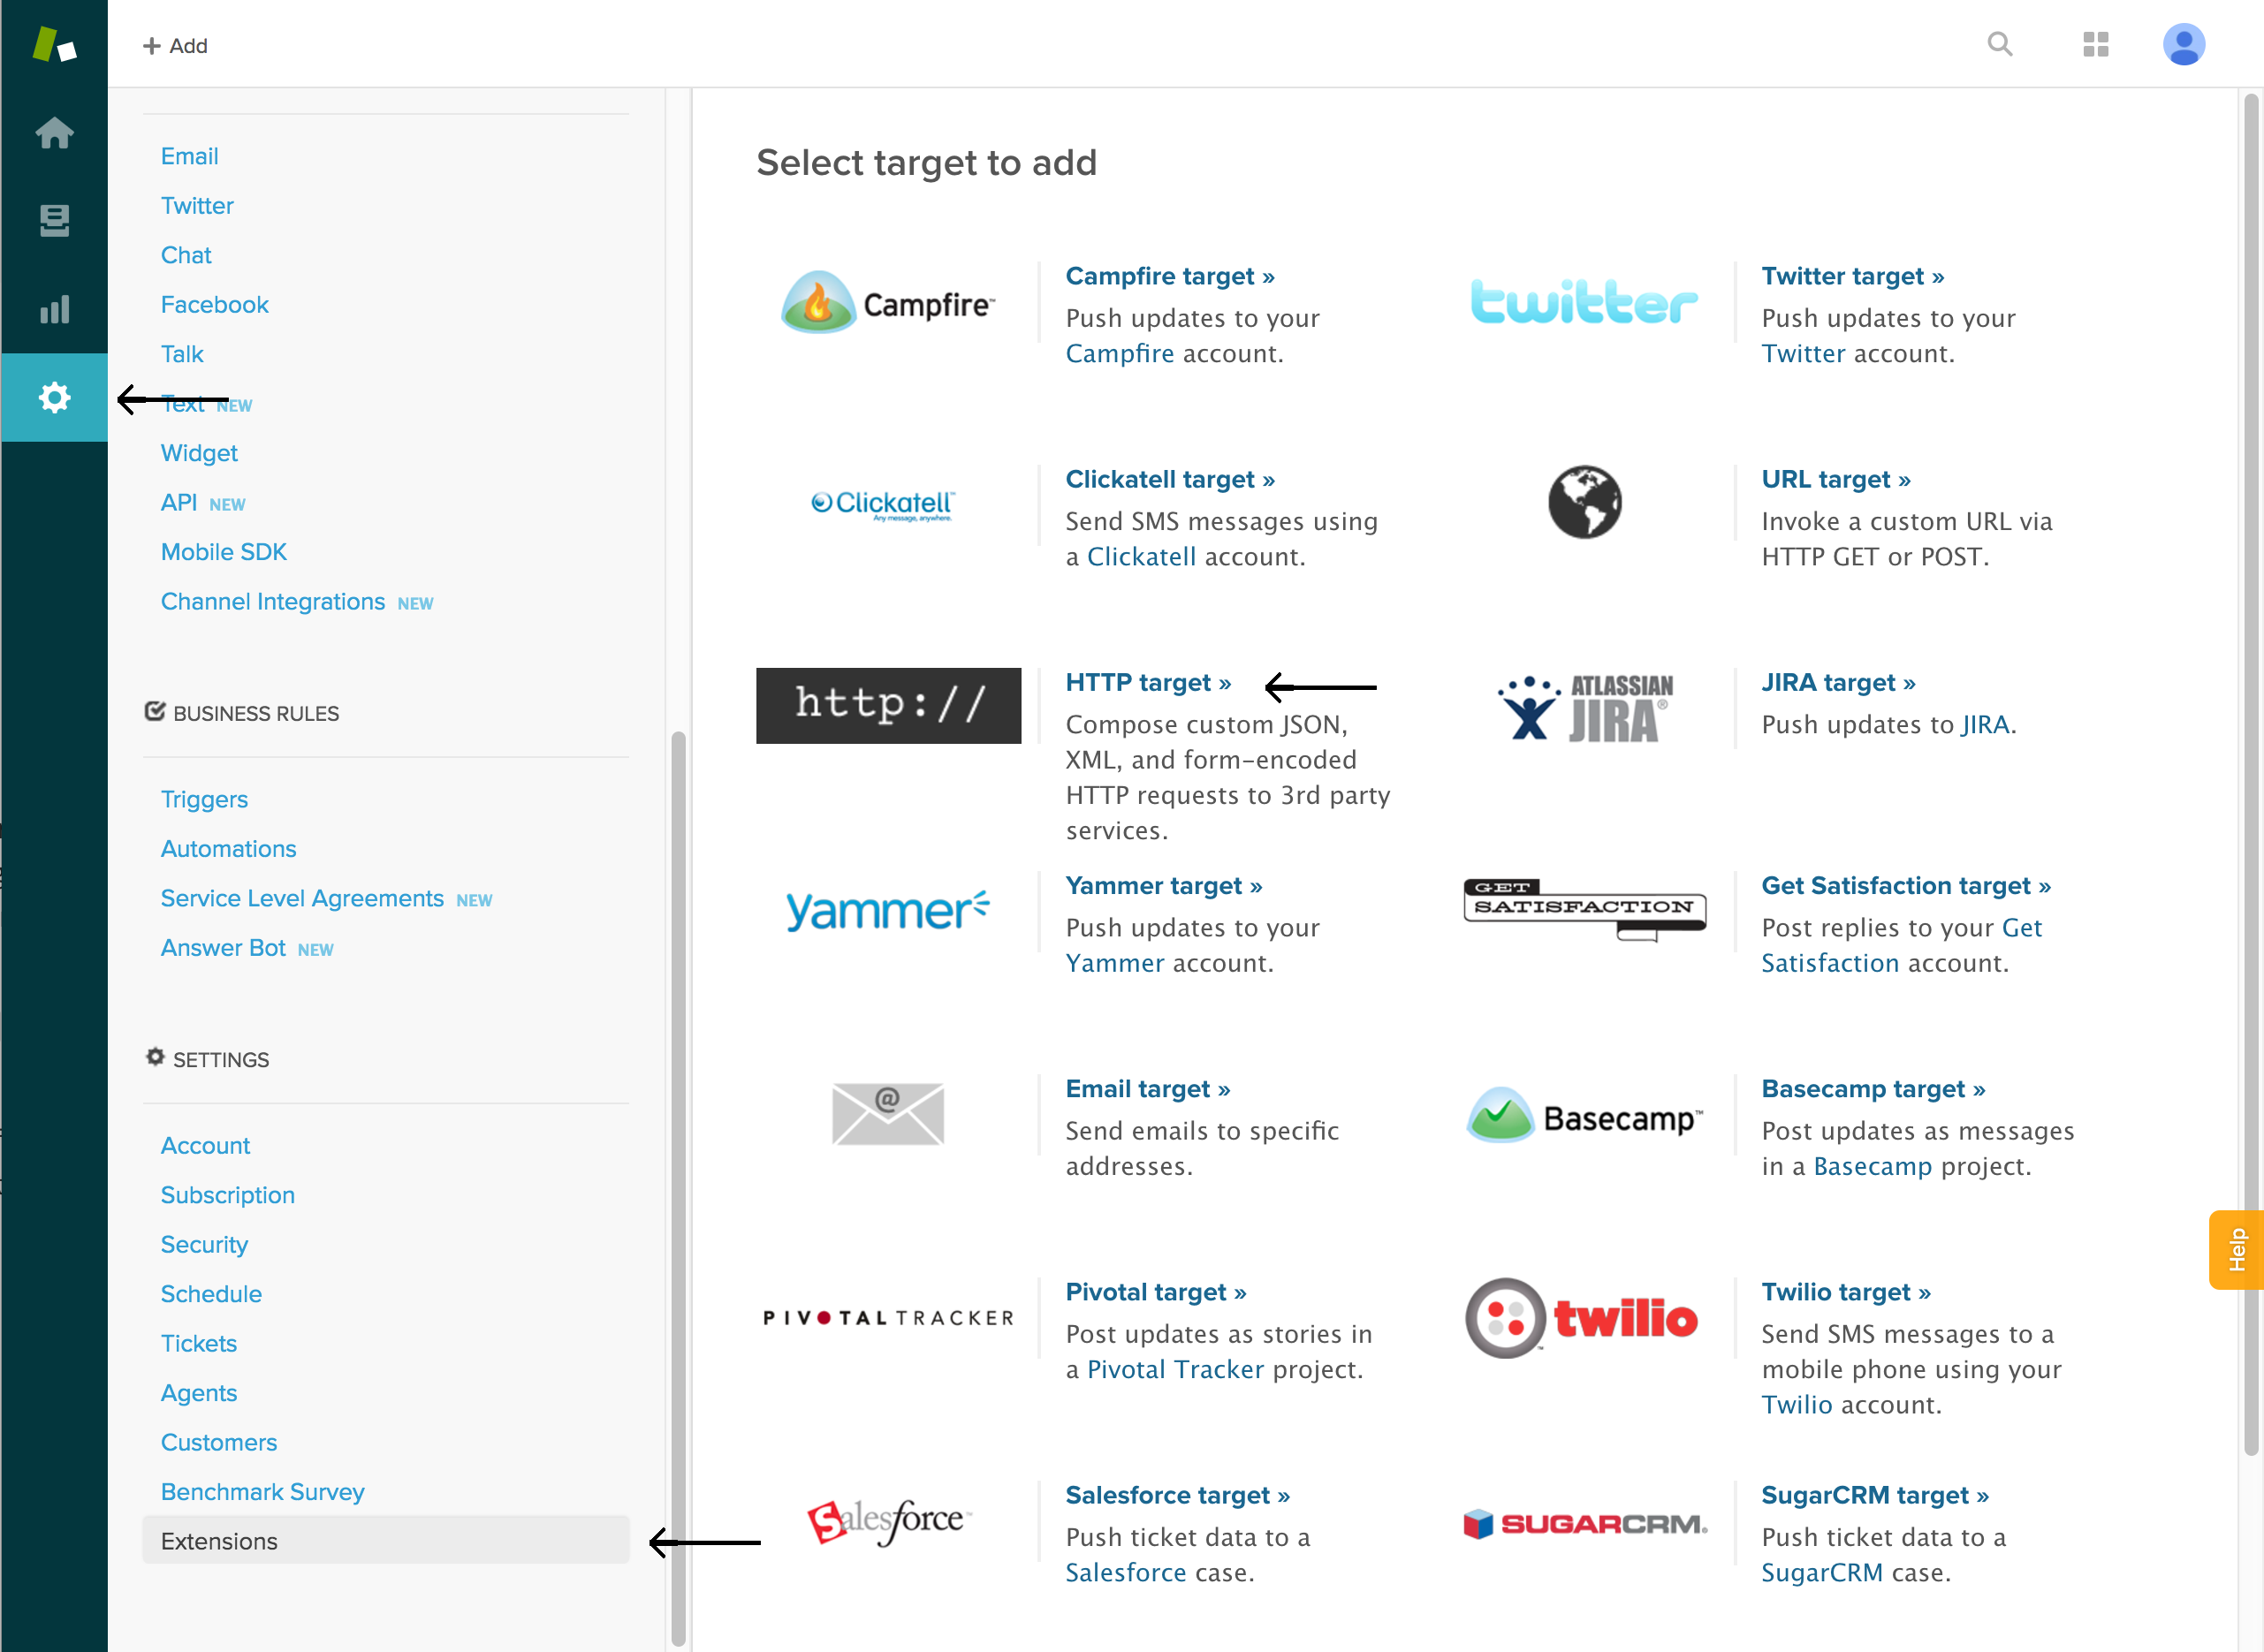
Now go to Zendesk’s backend -> click on the menu on the left side -> click on settings. Under Settings, click extensions -> click add target -> choose HTTP target.
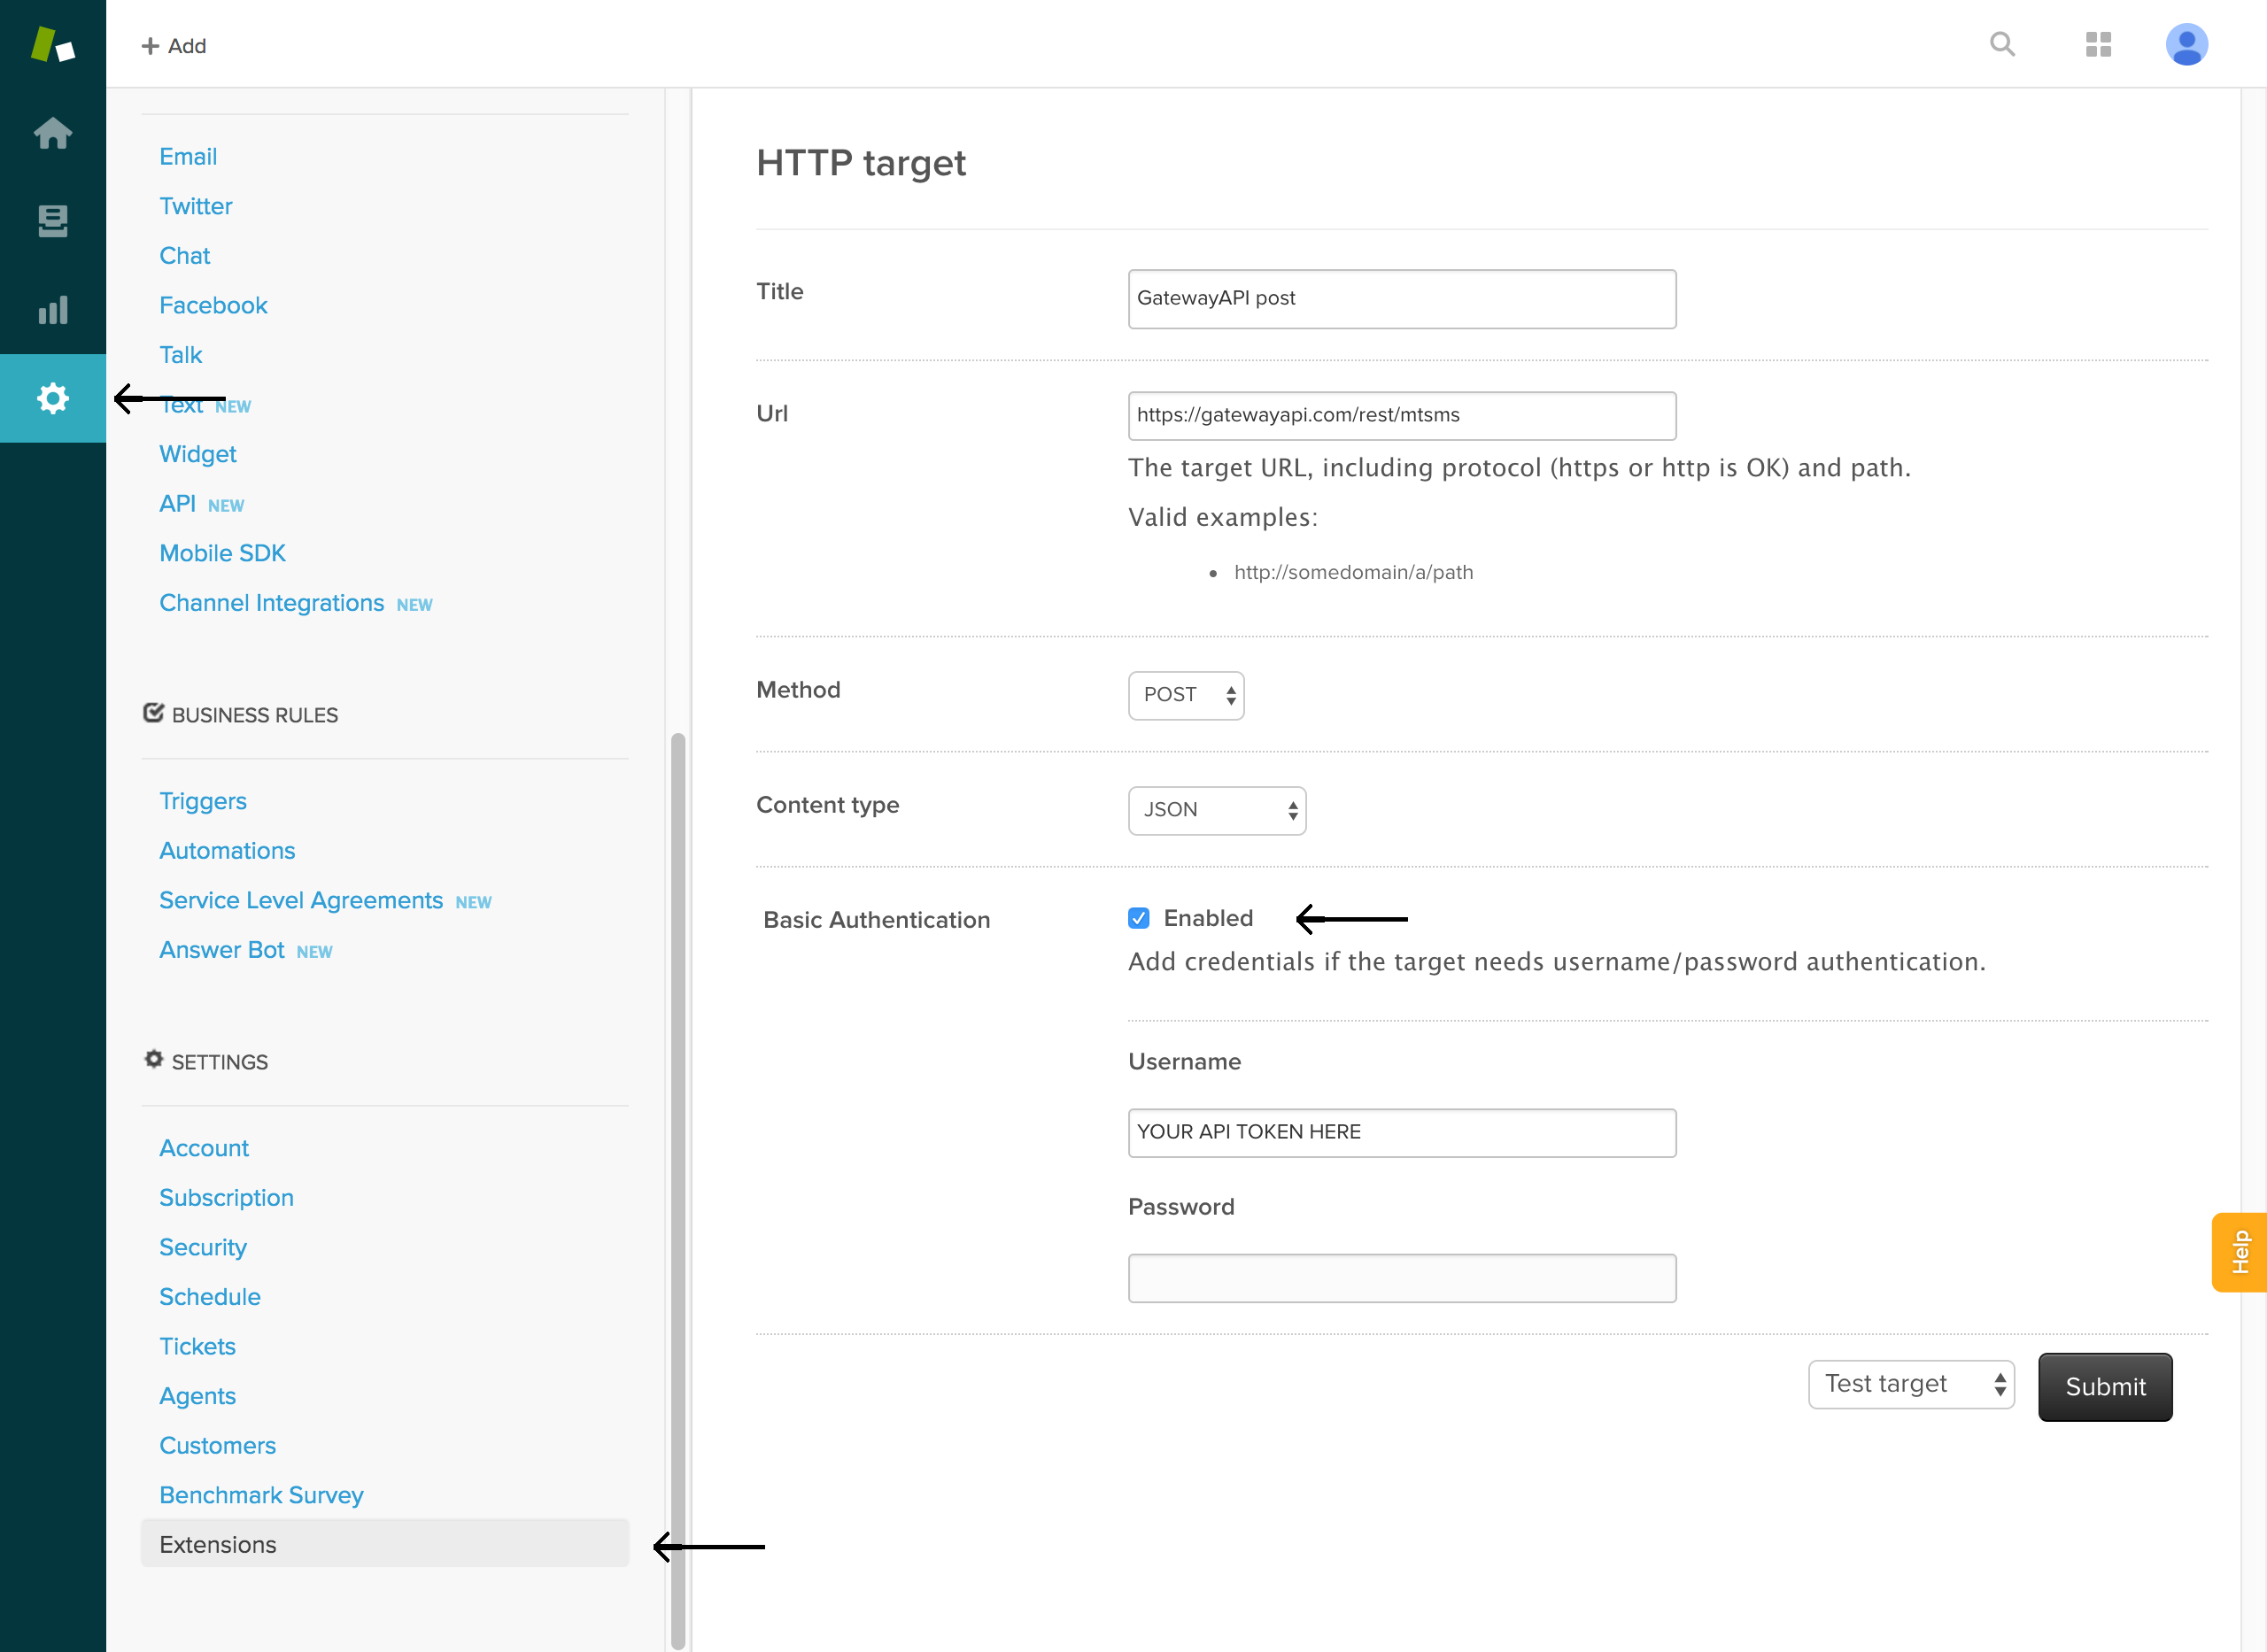
Now you need to set up your Target. Fill out the input fields as follows:
Title: Your Target’s name.
URL: https://gatewayapi.com/rest/mtsms
Method: POST
Content type: JSON
Basic Authentication: Enabled, put your API token in Username leave Password empty.
You can use the test Target option to make sure everything is working as intended and send yourself an SMS. Test Target prompt you to define the JSON body. You can copy the JSON below and use it to test your target. Remember to put your own phone number in the recipients list. Remember country codes.
When everything works, create the Target.
You now have a Target you can use to send SMS messages to your customers when an agent replies to their tickets using the custom field phone we added in the beginning of the guide.
The Target can also be used on other triggers to notify persons on your team, but unfortunately this can only be done to a predefined list of recipients and not in a dynamic way to notify specific agents, as Zendesk doesn’t offer access to the agents phone number under the triggers. But could potentially be used to send warnings if a ticket has not had a response within an hour, a day or whatever suits your business.
Setting up a trigger
To set up a trigger, go to settings in the Zendesk backend -> under ‘Business Rules’ click ‘triggers’ -> then ‘click add trigger’ or edit one of your existing triggers.
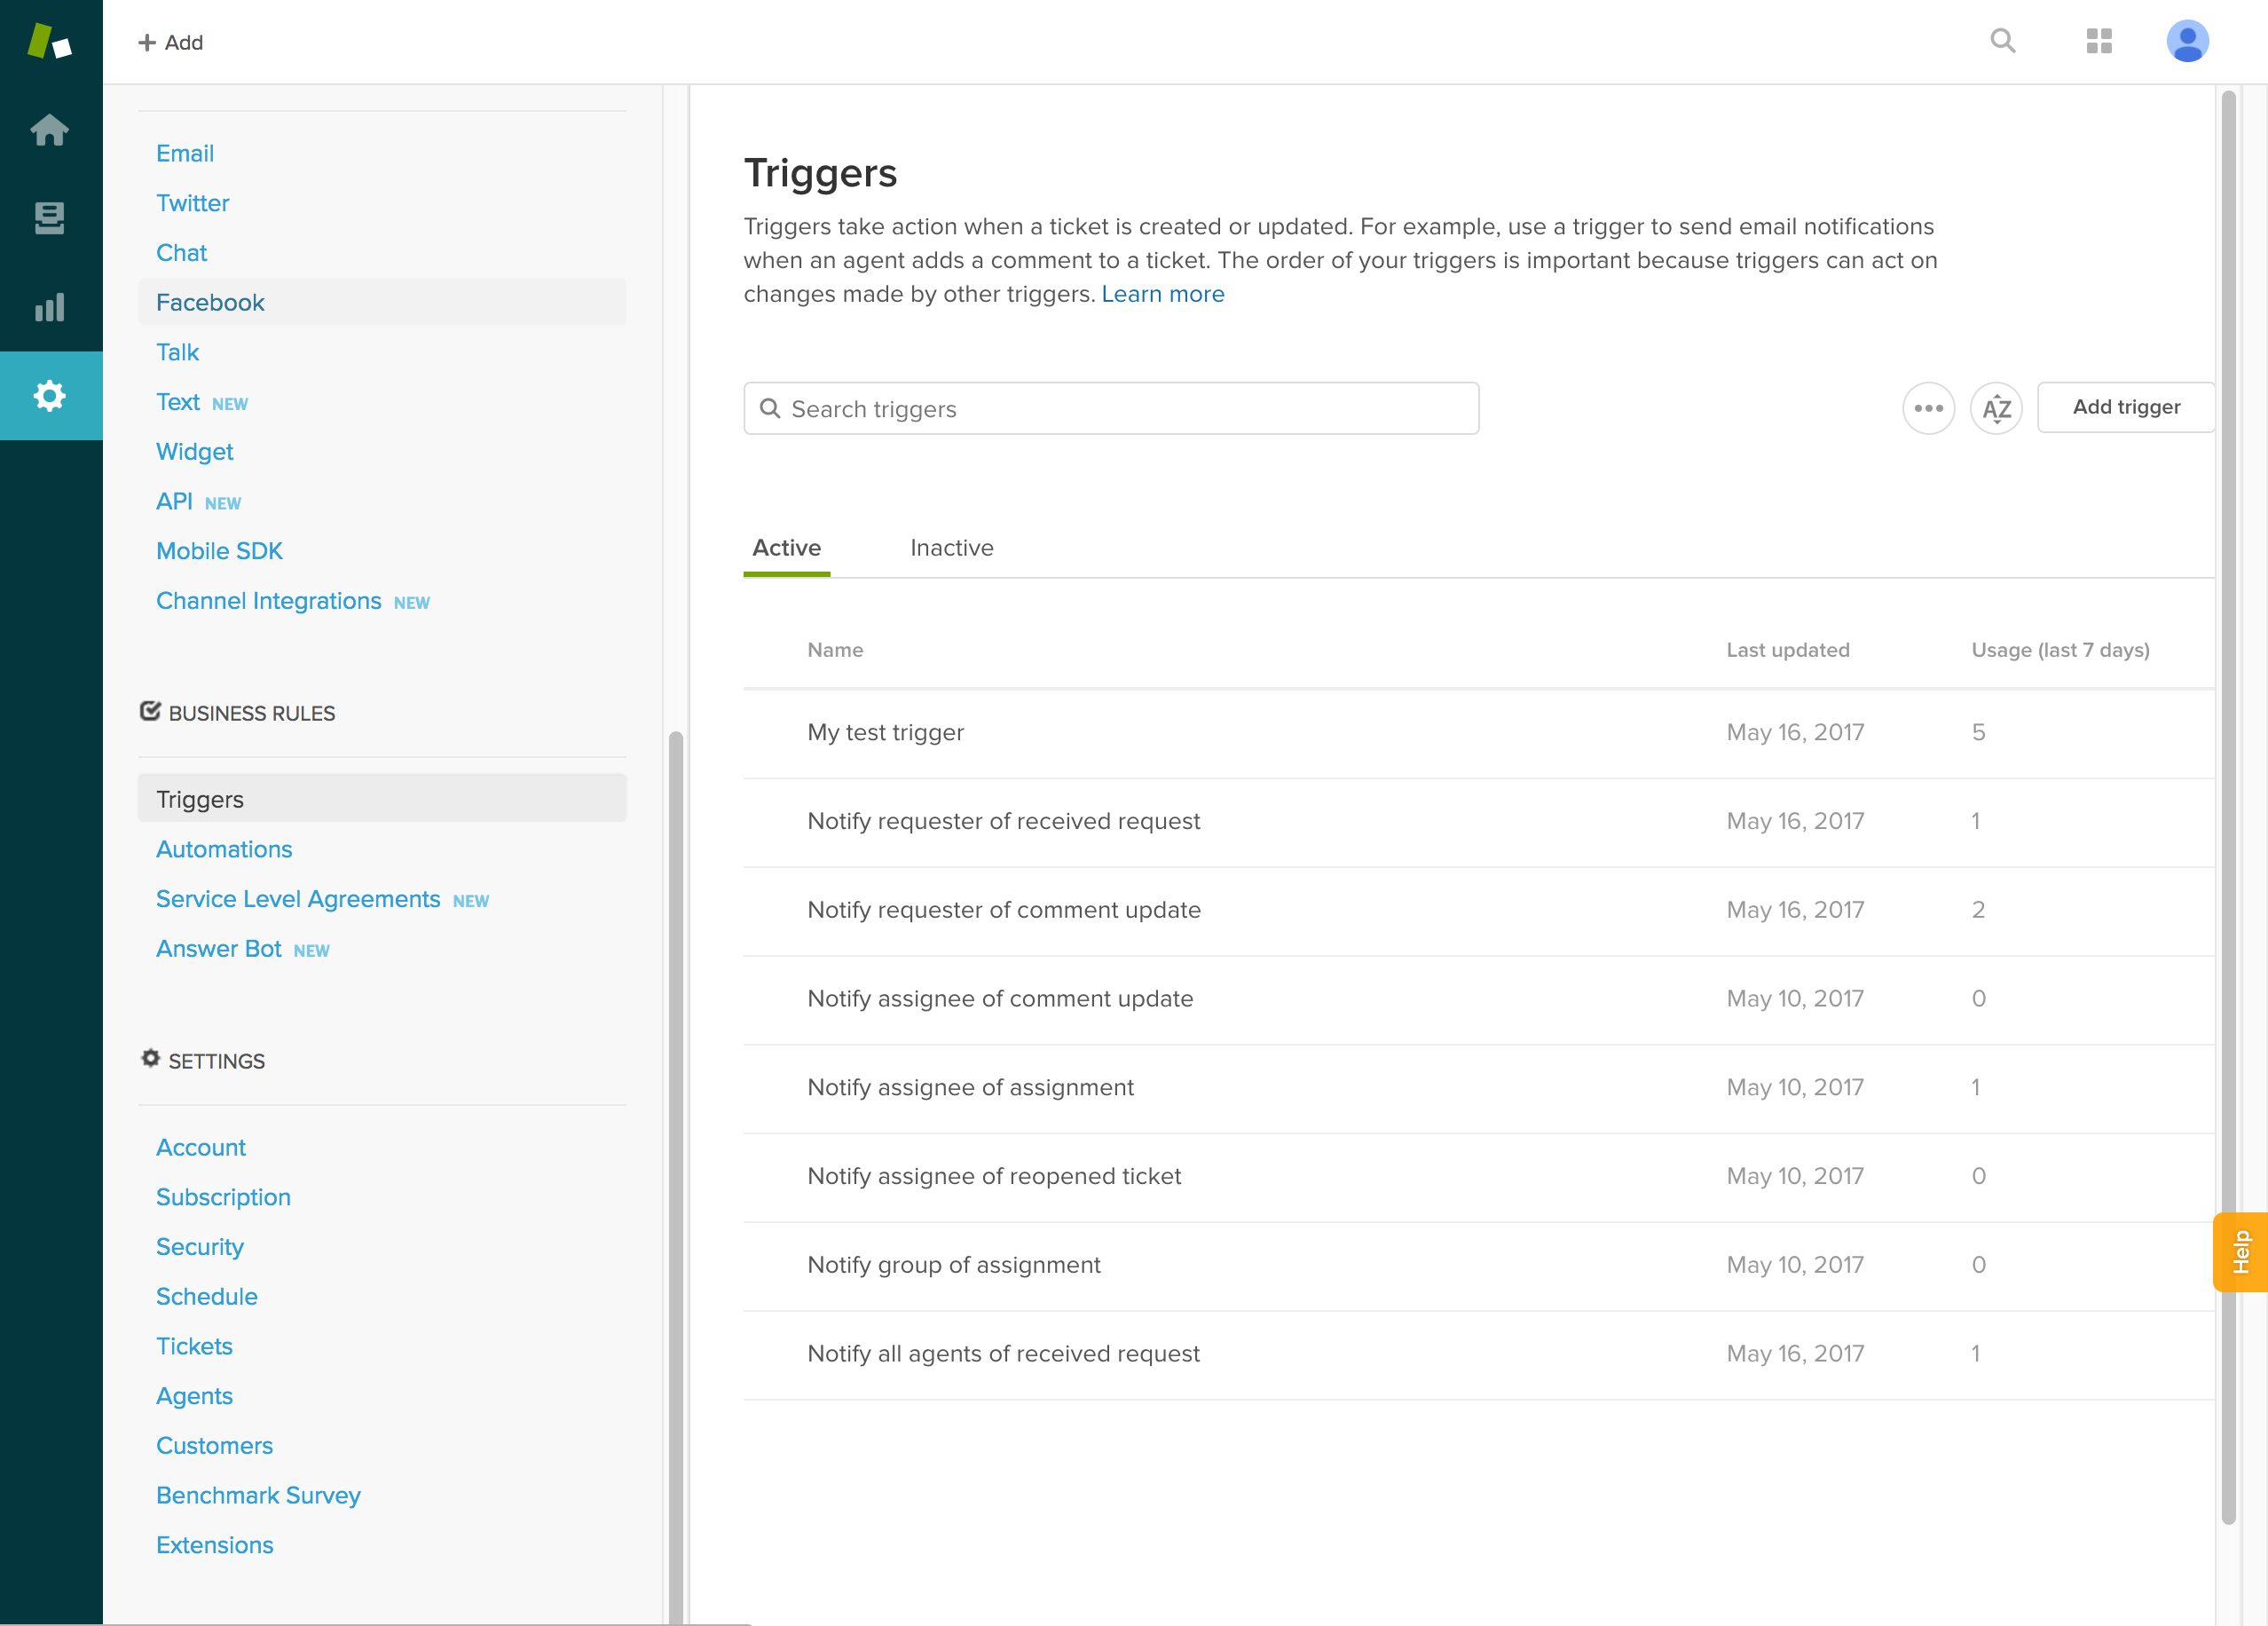
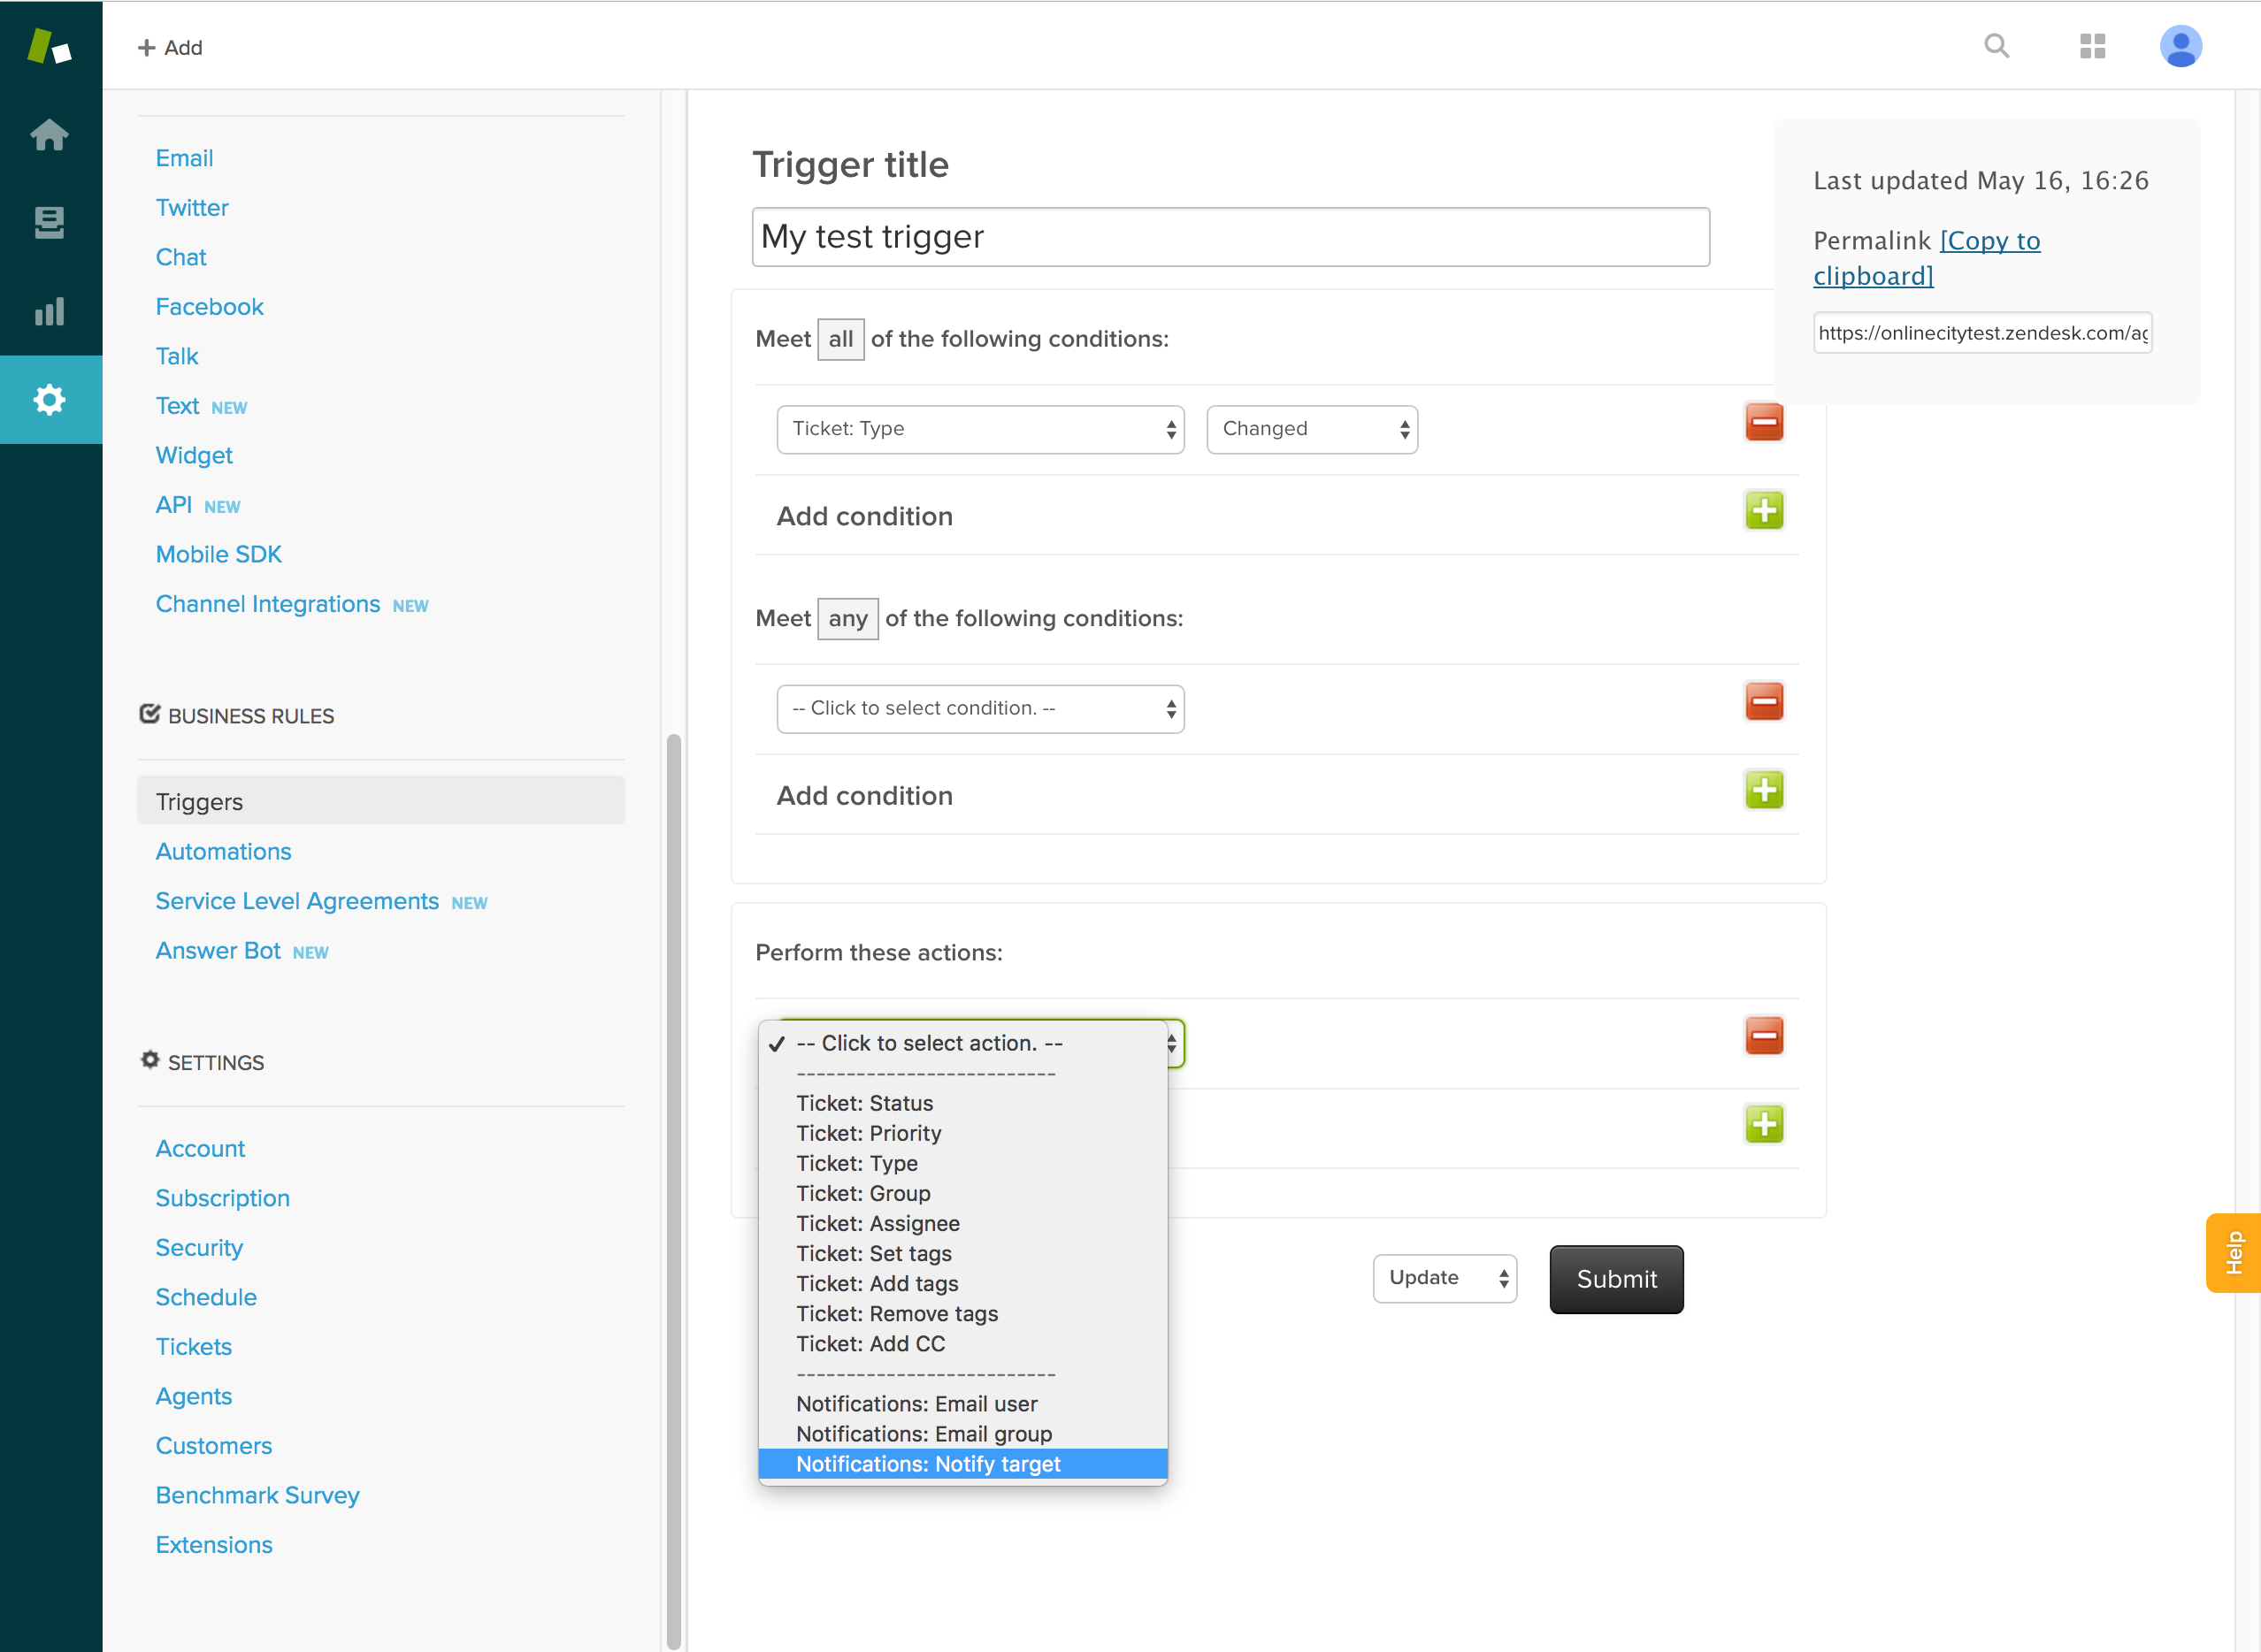
Under your trigger choose the conditions you want your trigger to react on. Here you can just edit the default trigger called ‘Notify requester of comment update’. All you need to do is to add a notification to add the Target action to the trigger.
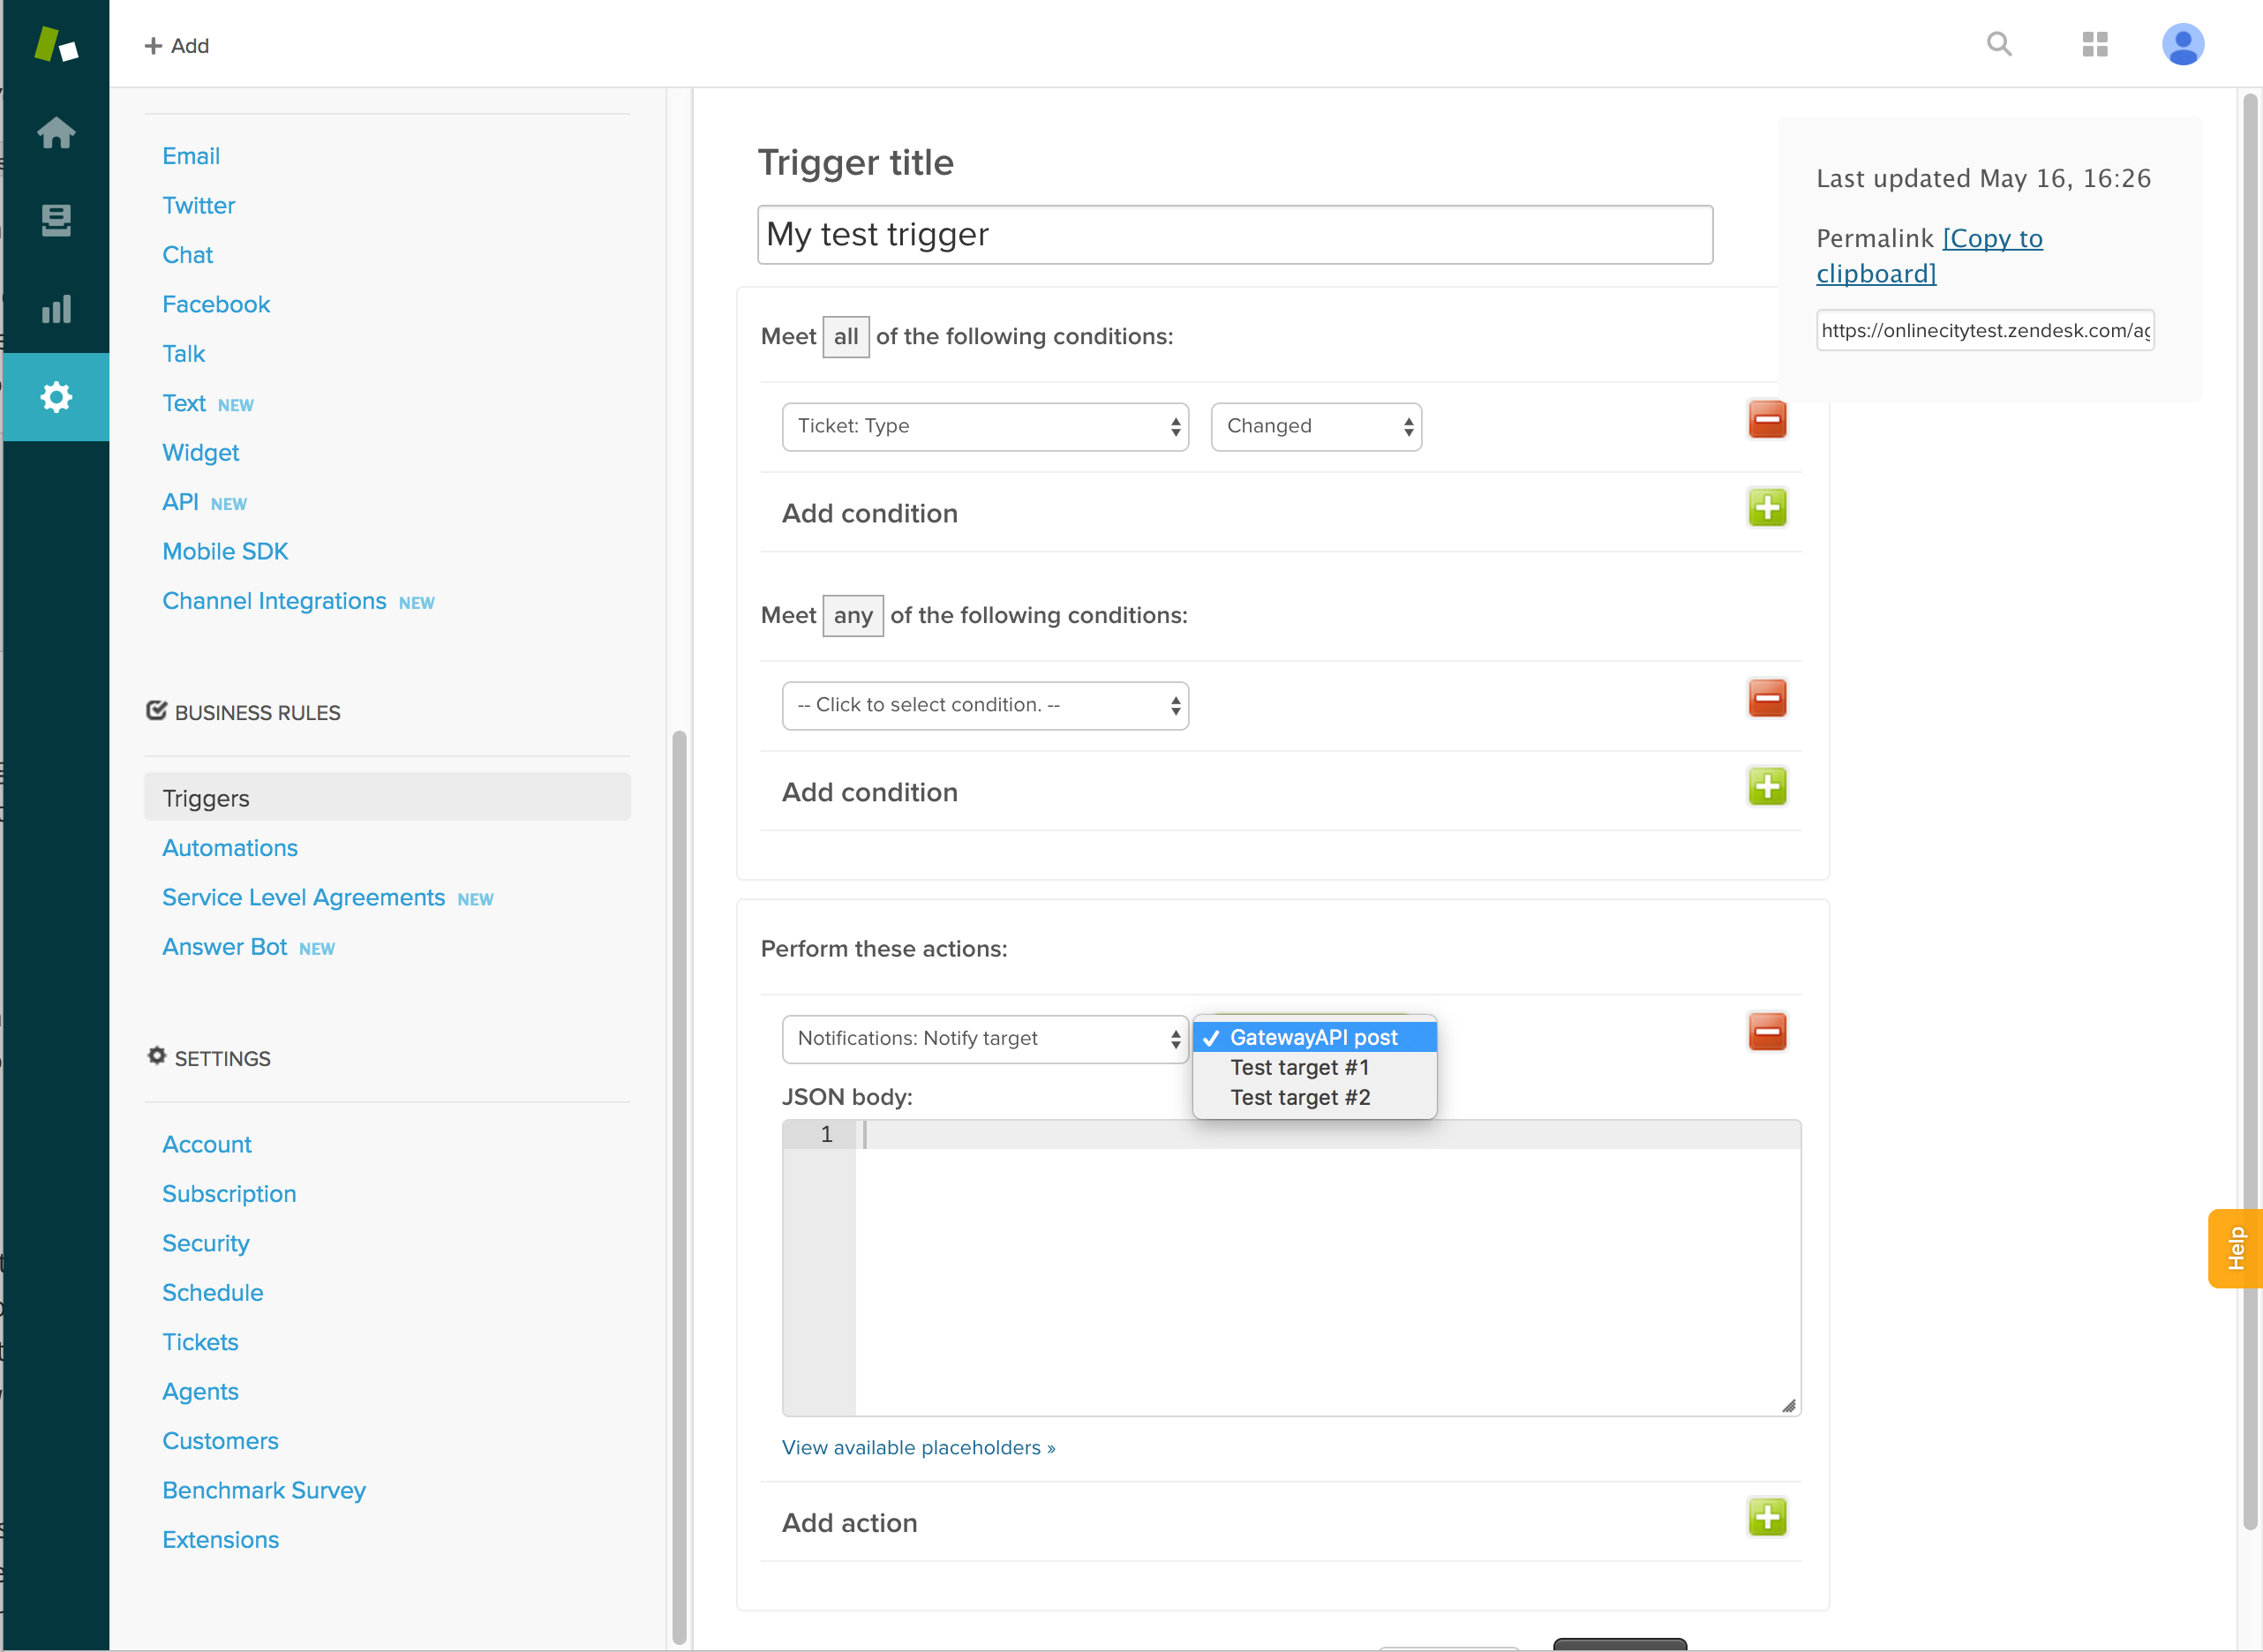
To define the JSON body for this trigger, you can use Zendesk’s ‘placeholders’ in the message. All available placeholders can be found by clicking ‘View available placeholders’. Your JSON body could look something like this.
You are now able to receive and reply to tickets using SMS messages.
Congrats!